
How To Soundproof A Home Music Studio / Practice Room (Brick / Block Construction)
A Basic Guide To Studio Soundproofing In 6 Simple Steps
Here at The Soundproofing Store we are very experienced in the design and supply of soundproofing systems for Recording Studios and Practice Rooms from home studios to professional.
Our system is very high performing whilst keeping space loss to a minimum which is ideal for smaller spaces like home studios, garage conversions etc, where building multiple layers of concrete walls are not an option.
Important note: Our studio specifications are based around a specific system. This is a system that is tried and tested and is proven to perform to a high level.
There will always be cheap alternatives, but in our experience, this leads to disappointing results. If you are serious about building your home studio / garden studio / garage studio and want to make a serious reduction in volumes, have a good read through the below info.
If you need further advice about your specific situation, contact us to speak to our dedicated studio soundproofing advisors.
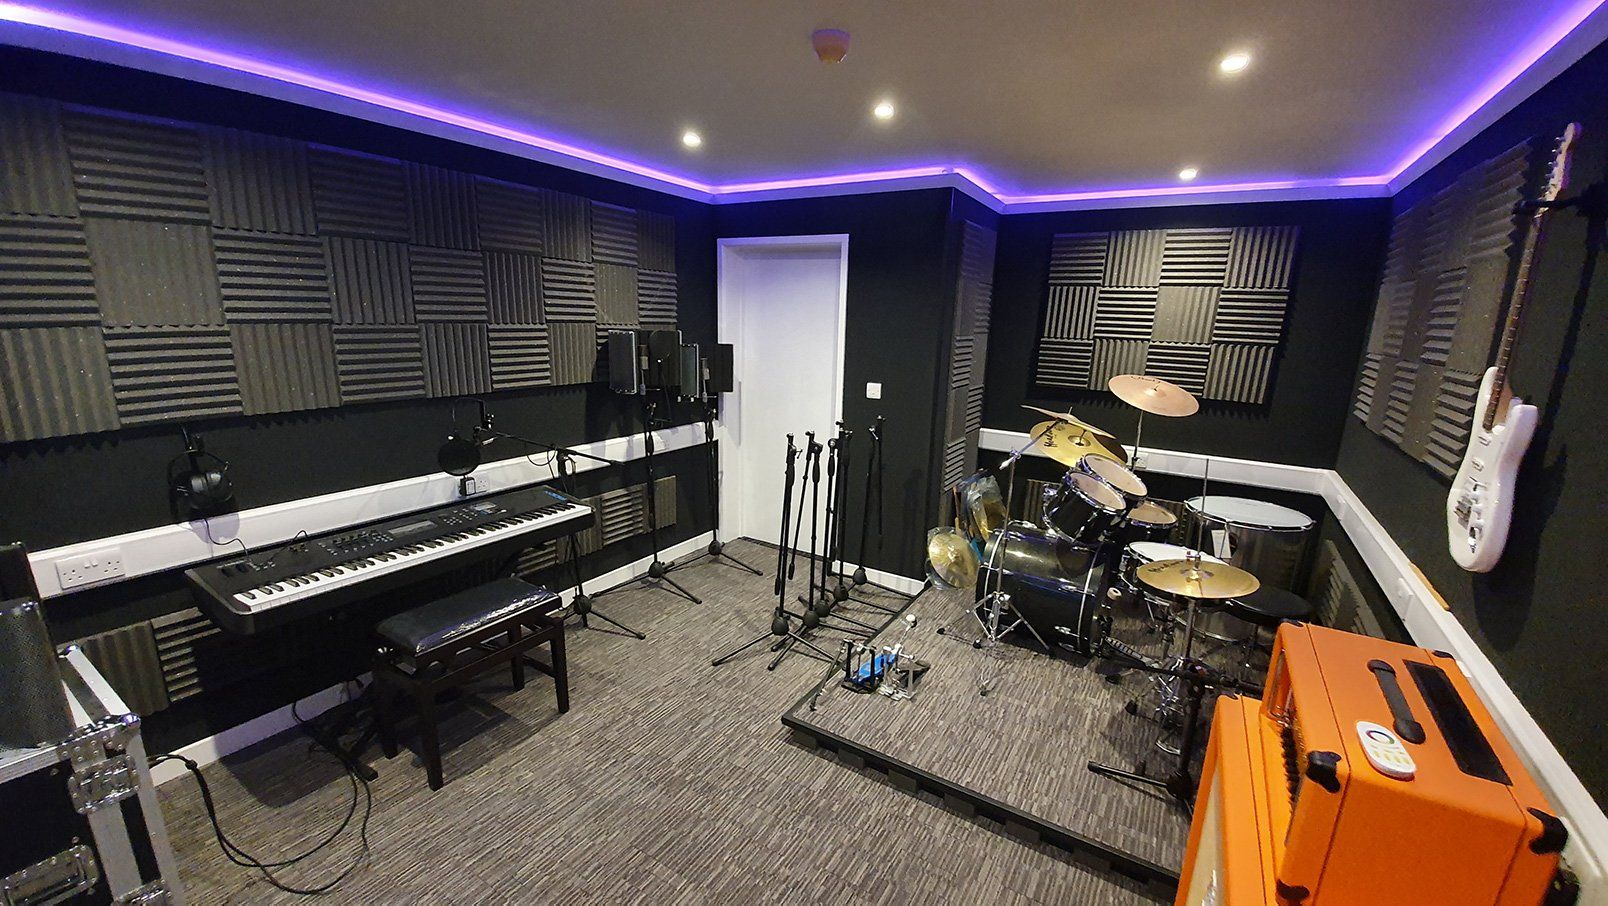
Past Studio Client Videos
Below are a few videos sent to us by studio clients. These videos show elements of the build / installation and also sound tests to show the effectiveness of the soundproofing.
Our Basic Guide To Soundproofing Your Home Studio or Practice Room
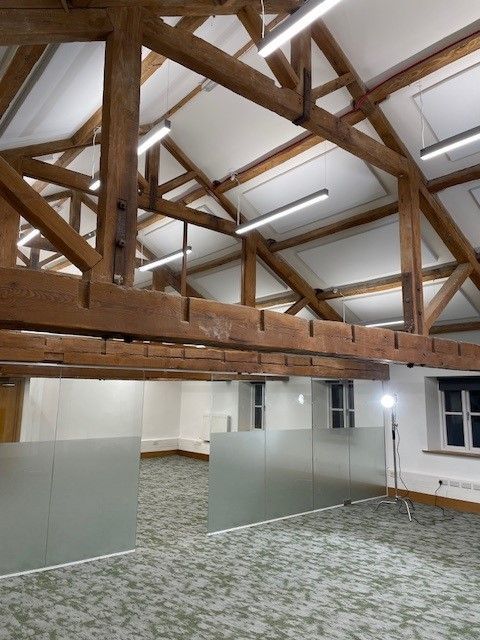
Here are our 6 basic steps to achieve a high level of soundproofing for high decibel applications. This can be applied to purpose-built studio buildings, garages, out houses, or even rooms within your home.
Step One - Room Within A Room
This is the most important piece of advice we can give, and a step that a lot of people mistakenly think they can skip.
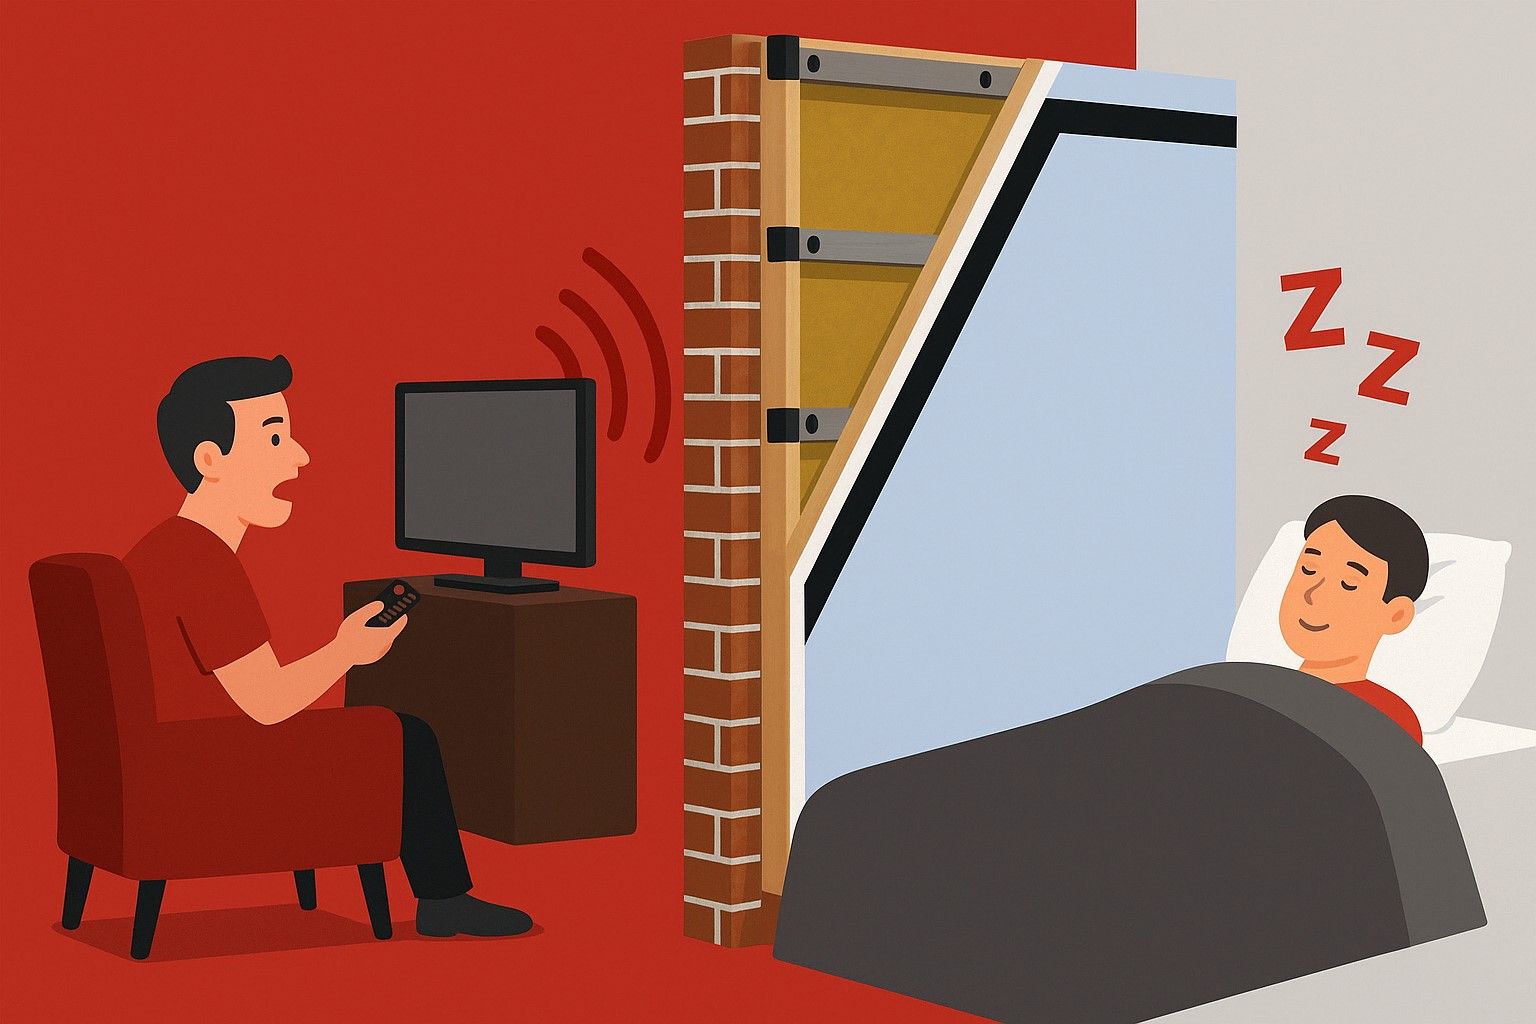
When a high volume of sound is created it creates an Airborne sound wave but also a strong vibration energy . The airborne sound will spread out 360 degrees around the studio and therefore needs to be blocked in all directions. However, more importantly, even if you are more concerned about sound travelling in a particular direction, you need to absorb the energy and vibration. If the vibration gets into the structure of the building it will spread very easily through the contact of solid material. Therefore, if you soundproof your walls but not your floor for example, the vibration will spread through the floor, under your wall soundproofing and still get into the walls behind. Or can spread from a non-soundproofed wall into a soundproofed wall by bypassing the soundproofing.
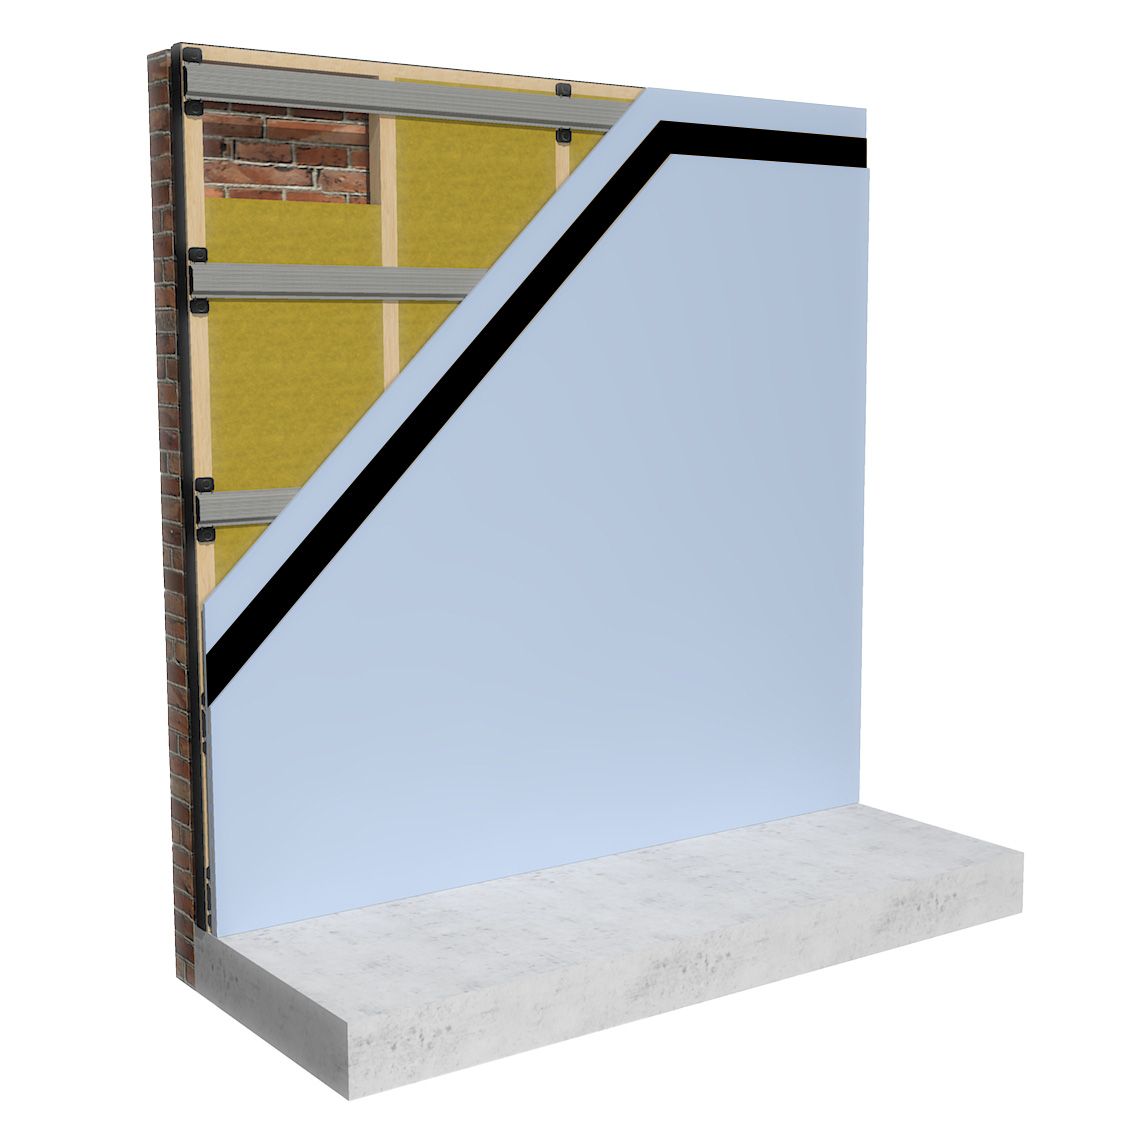
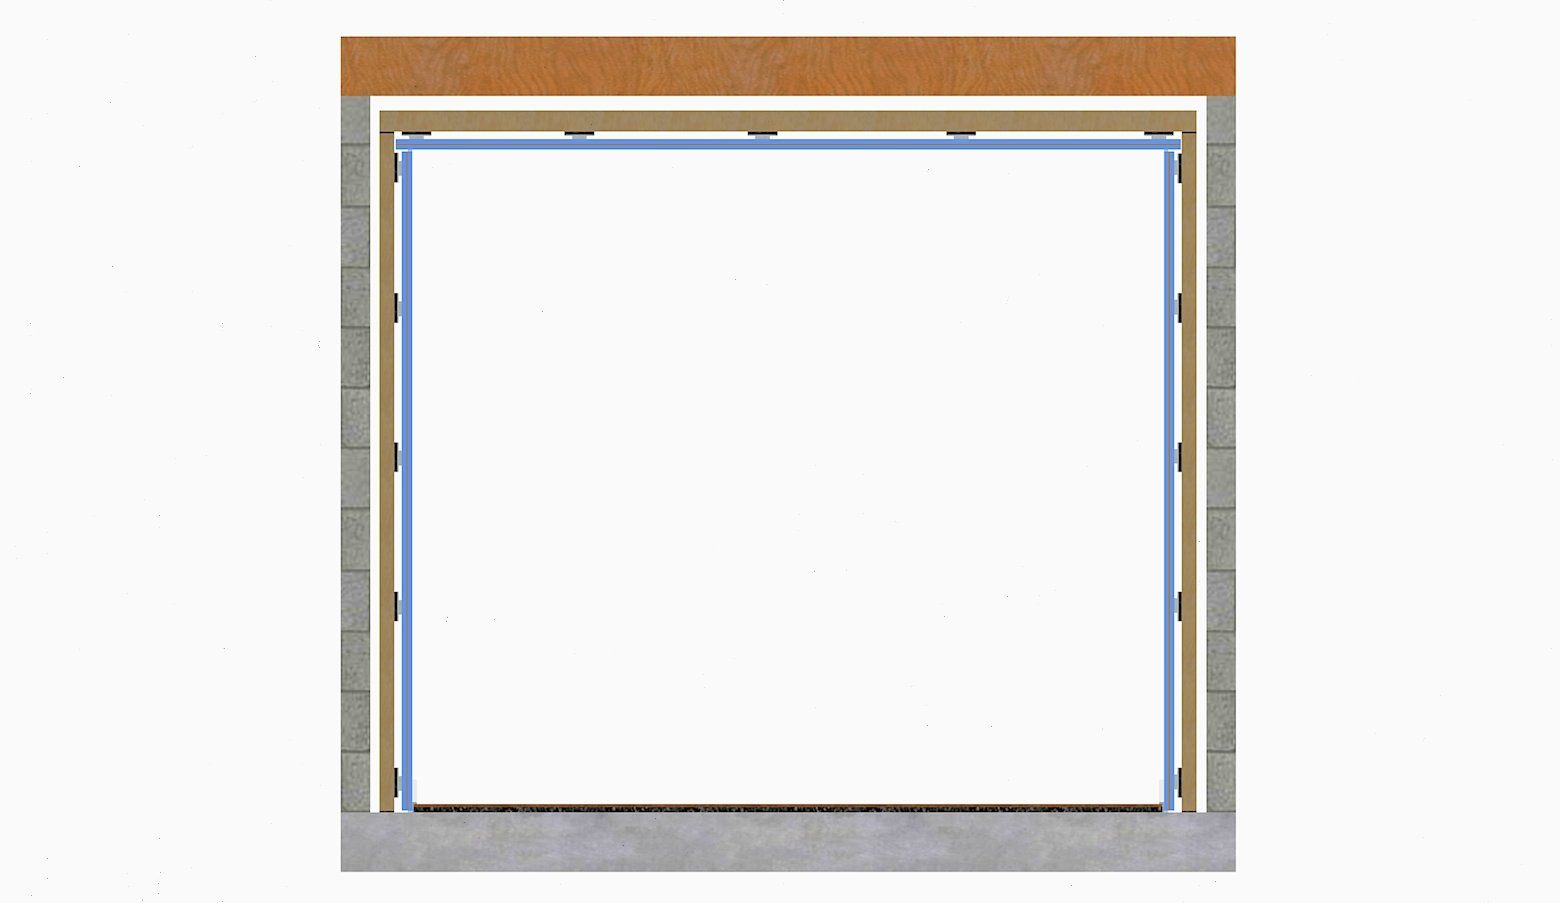
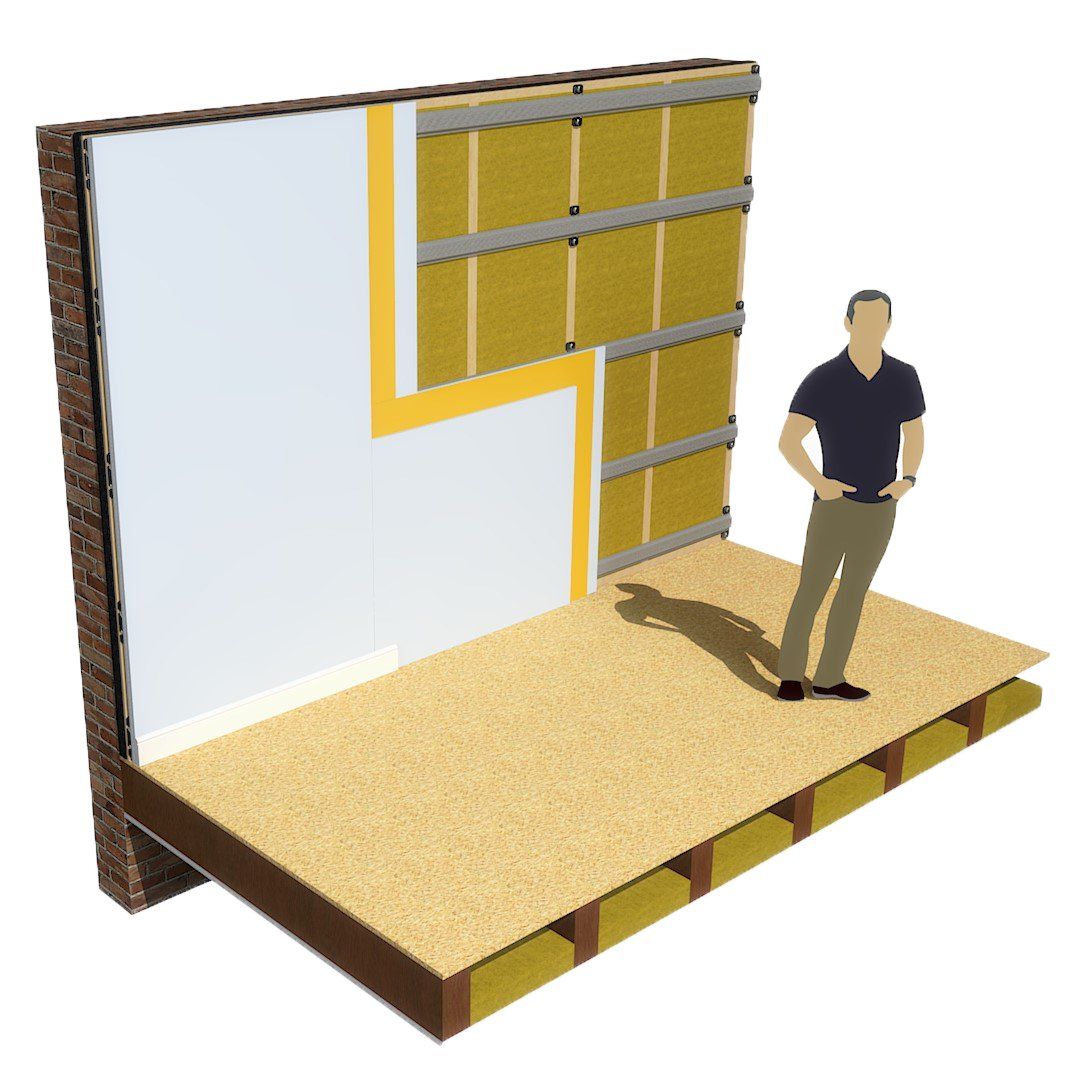
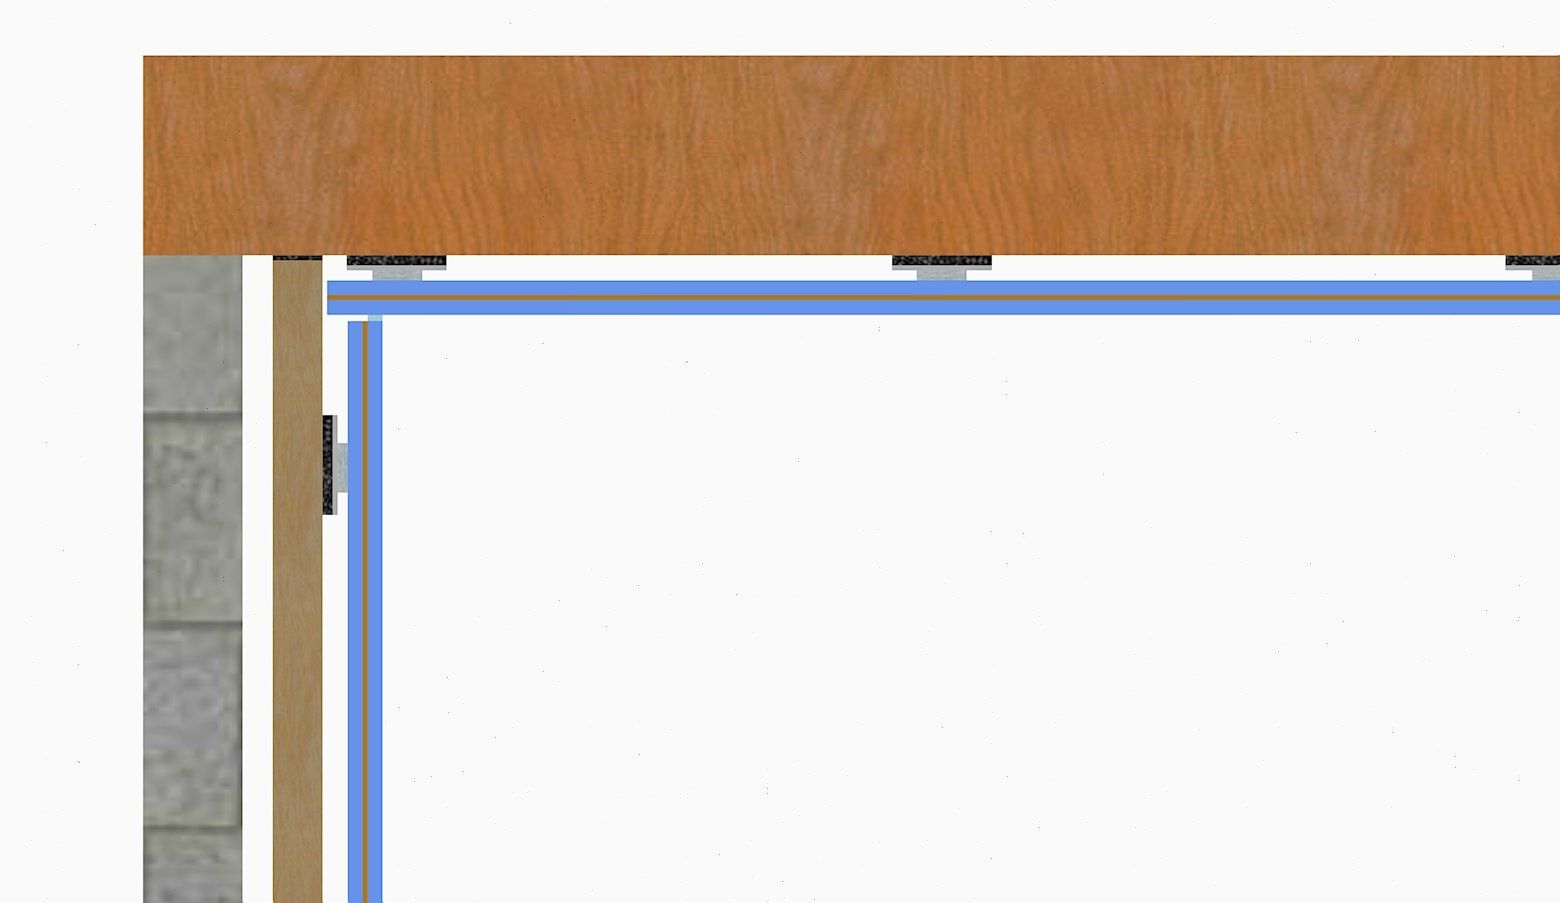
So regardless of the construction or location of your studio it is incredibly important to build a de-coupled wall in front of every wall, a suspended ceiling and a floating floor to create your “room within a room”. This is the only effective way to contain the airborne sound and the sound energy within the “inner” room and stop it from getting into the structure of the building.
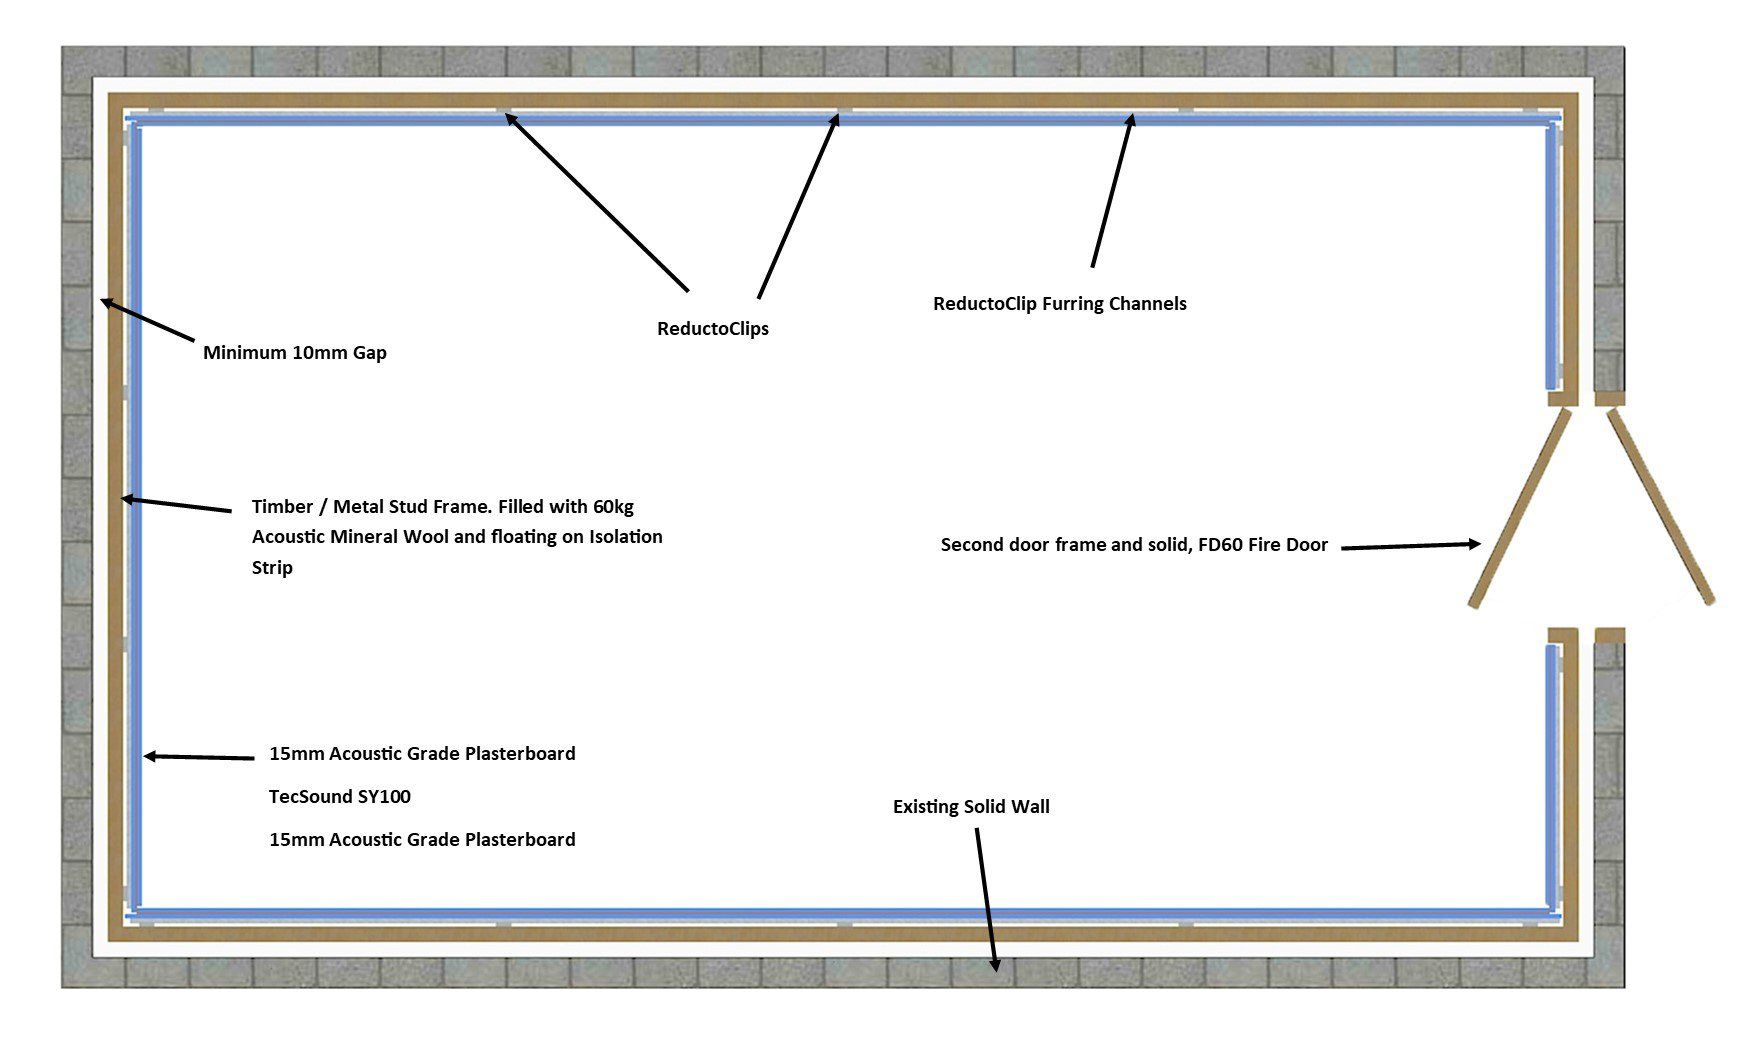
We achieve the “room within a room” by building independent stud frames (metal or timber) in front of each wall, but not touching. You should have a minimum of 10mm between the frame and wall, but the bigger that gap the better.
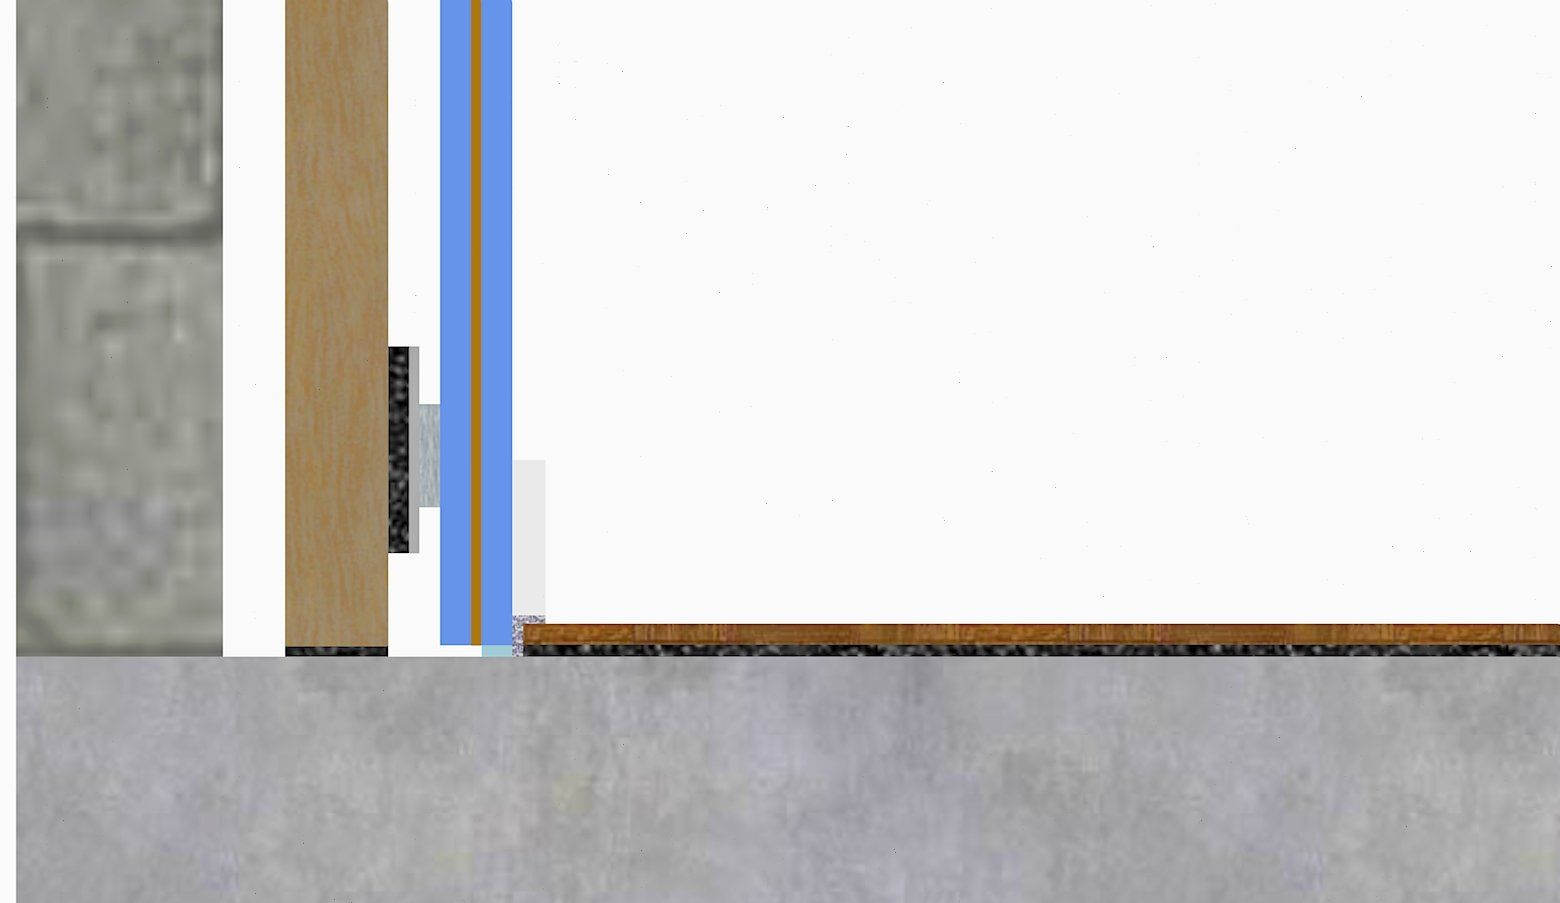
If possible float the stud frame on an isolation strip around the perimeter. This should be dense enough to bare the weight of the walls, while still being able to absorb vibration. Try our
ProSound Isolation Strip.
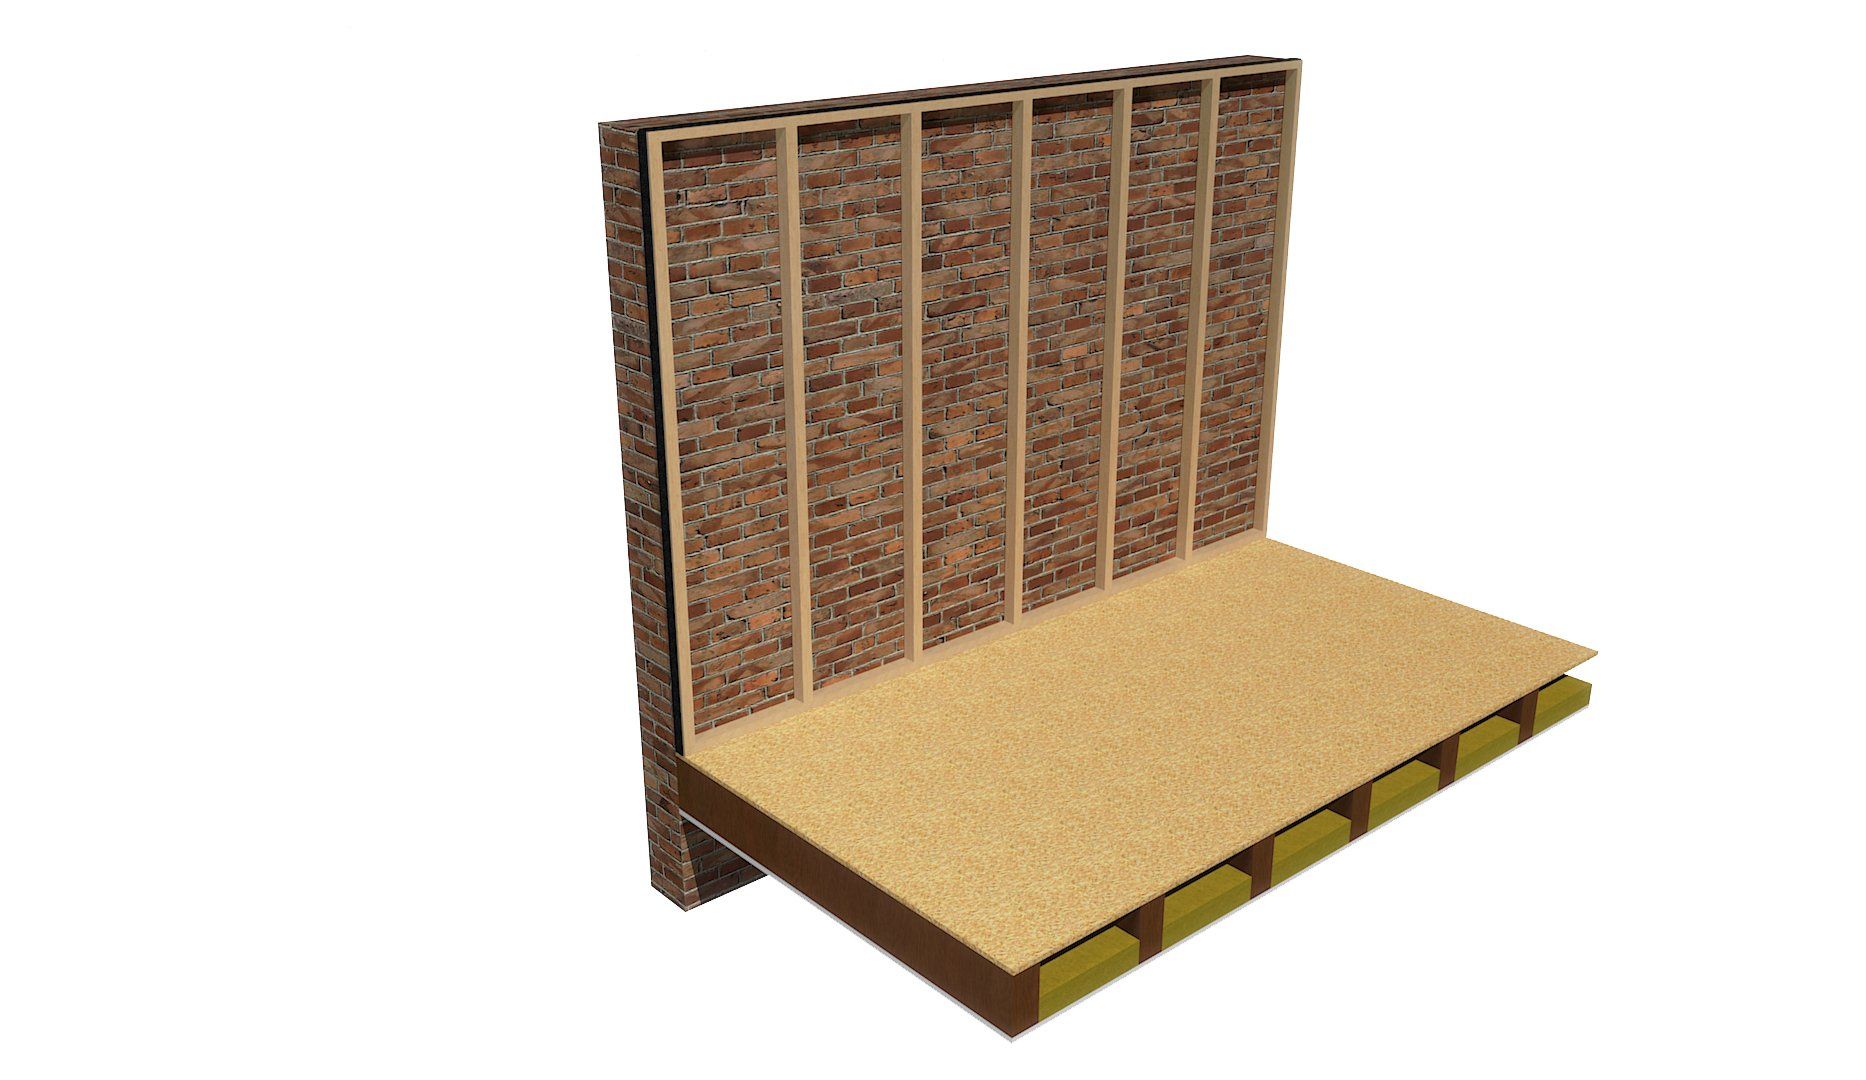
Because this stud frame will create a hollow cavity, you will then need to fill the frame with acoustic insulation to stop sound from resonating and amplifying in this cavity. We recommend a 60kg acoustic mineral wool insulation.

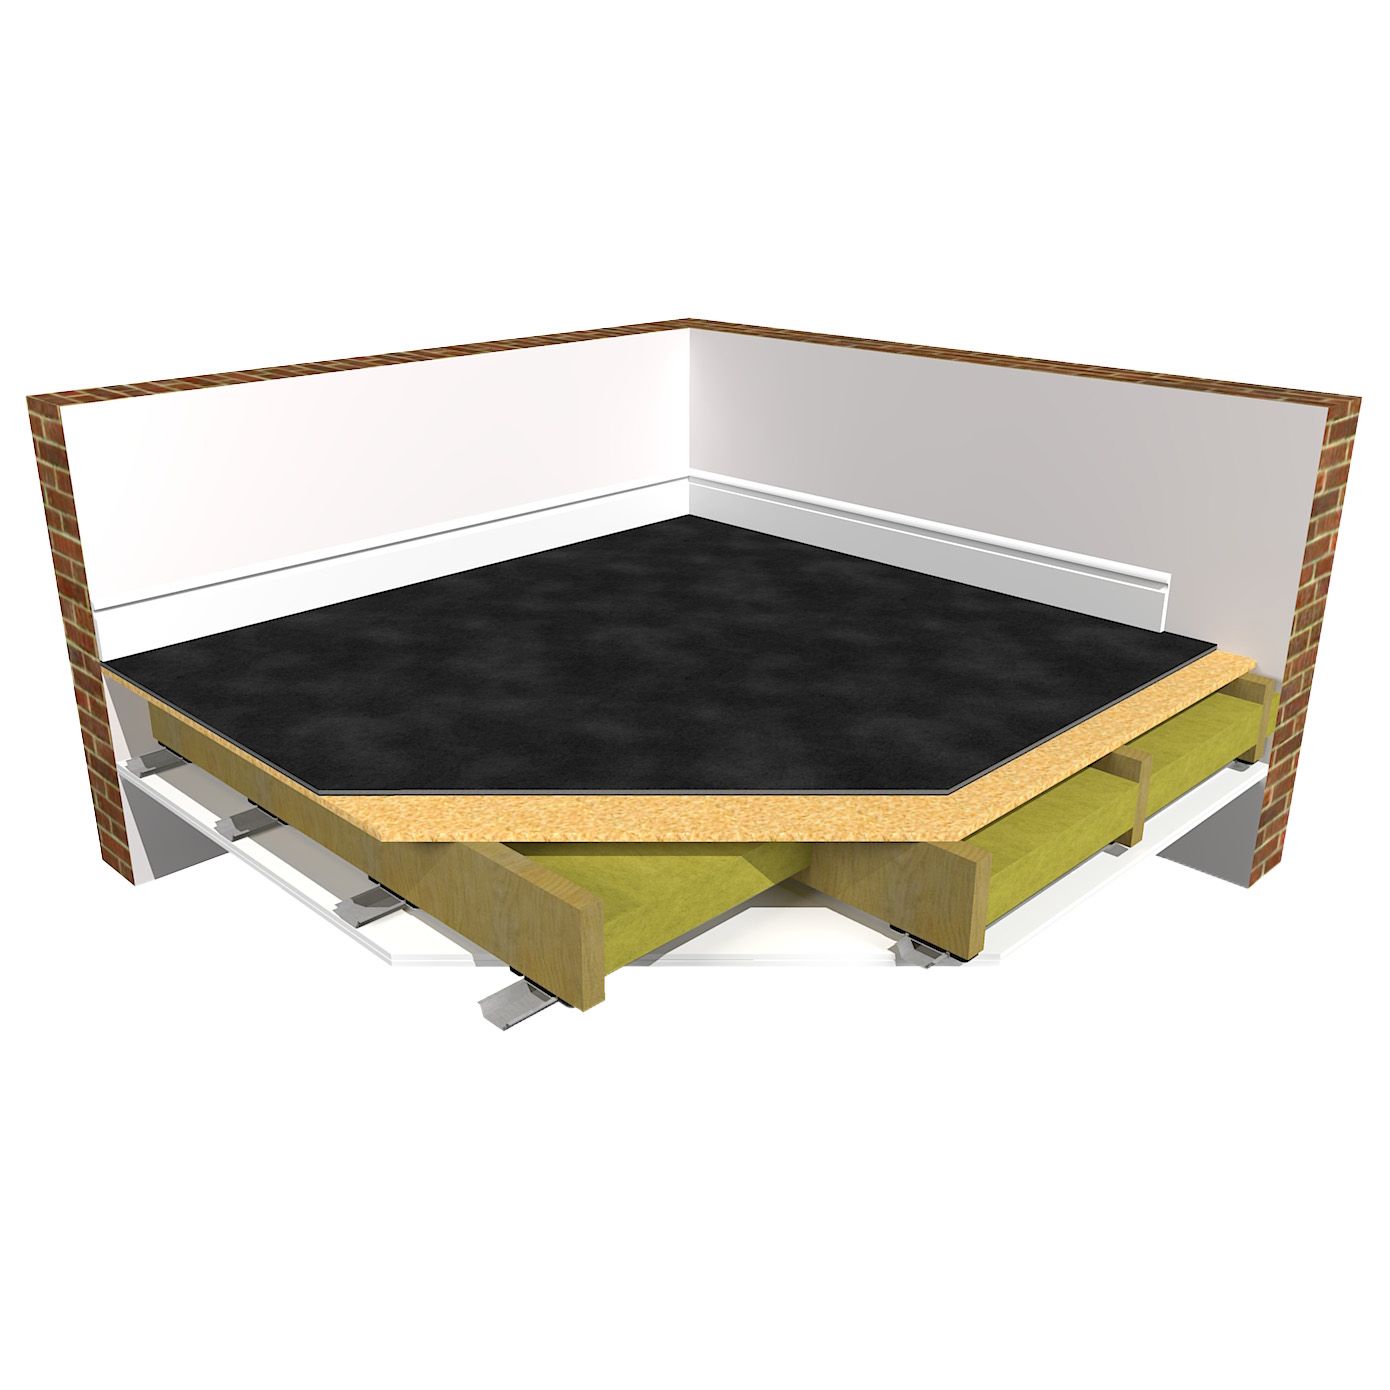
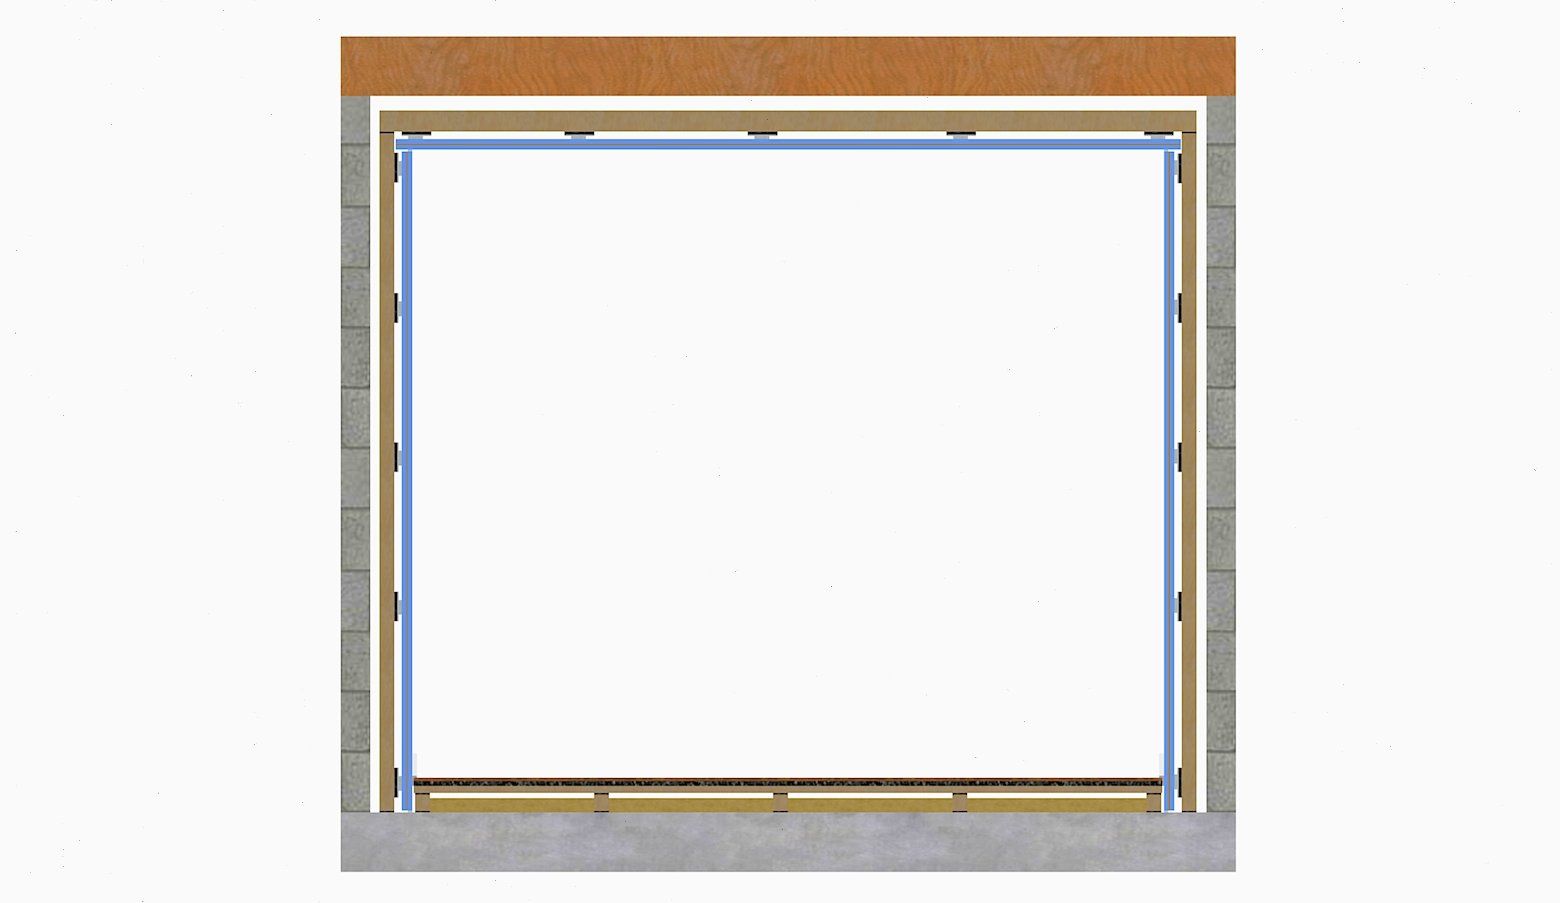
Depending on how much height you have to play with in your chosen space, you can do similar to the floor and ceiling, building a floating frame on the floor and floating frame below the ceiling, or if height is low to start with you can de-couple the floor and the ceiling in a more space saving way.
Floor - If you have a concrete floor, you don't need to add any more mass. So you can get away with a minimal layer of vibration absorbing matting on the floor. This separates your floor finish (carpet, laminate etc) from the structural floor (concrete) and absorbs the vibration in between. Height loss will only be around 5 - 10mm. You could use a floor layer such as our
ImpactoMat 5mm
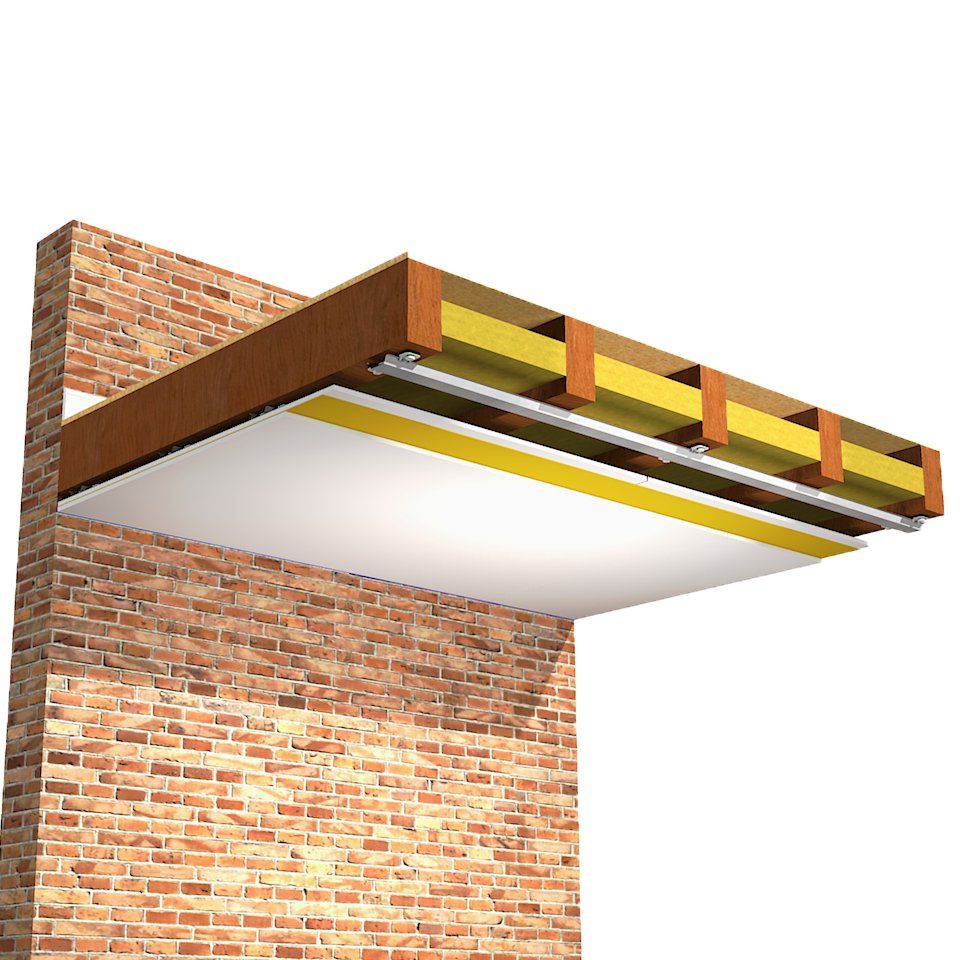
Ceiling - Your suspended ceiling can be fixed directly to the bottom of the existing ceiling joists for minimal height loss. As long as the joists are insulated with acoustic mineral wool.
Floor- The same as above with a thin resilient floor matting
Ceiling - Keep the existing ceiling in place, but install secondary ceiling joists. These can be sat on top of the wall frames if thick enough, if not fixed around the perimeter walls. Fill the secondary joists with acoustic mineral wool insulation, then install the suspended soundproof ceiling to the bottom of the secondary joists.
Floor - float timber batons on isolation strips across the floor. Fill between the batons with acoustic mineral wool insulation. Add strips of isolation strip on top of the batons, then add a structural floor layer such as T&G chipboard (18mm / 22mm), then add a soundproofing matting on top to add mass and resilience to the floor. Something like our
SoundMat 3 Plus would be perfect. Then your final floor finish on top.
This will build up your height much more and be more expensive, but performance would be greatly improved if you need it.
Ceiling - Secondary Joists as above.
Step Two - Add Mass
The only thing that blocks the airborne sound wave, is mass .
Mass is basically weight, so the heavier and more dense a material is, the more sound it blocks. Therefore, starting with a structure that is higher in mass is always a better start. A brick or concrete block building will naturally block a higher level of sound than a timber building for example.
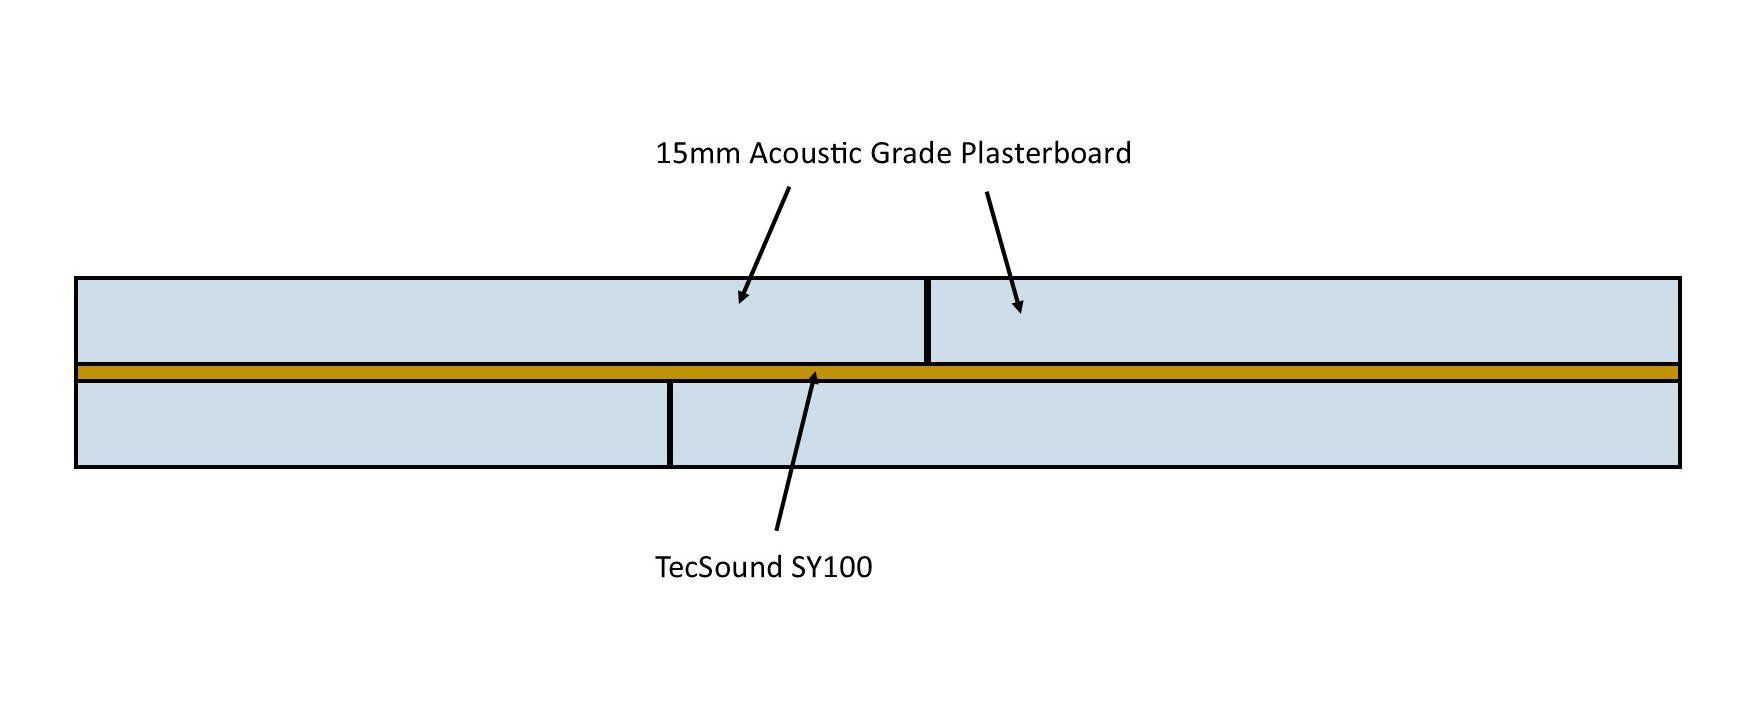
We want to cover our new internal wall frames with multiple layers of heavy, dense materials. At the same time, we want to mix different types of material so that we can block a wider range of sound frequencies.
We recommend a combination of Acoustic Plasterboard and FlexiSound 5 .
We aim to add 35kg of mass per m2.
If your initial structure is low in mass, such as a single brick wall with weaknesses or a timber structure. You can add more mass to the structure before building your new wall frames. Using layers of acoustic grade plasterboard, or cement particle board will increase the mass of the building.
Step 3 - Add Resilience
Resilience gives a material the ability to flex, move and absorb impact.
It’s the same principle as how the suspension springs in a car give you a more comfortable journey, because the car can absorb the impact of potholes much easier. A rigid car with no suspension would be a far more uncomfortable ride.
By suspending our mass layers on a resilient system, it means that the mass layers (plasterboard and TecSound) can flex, move, and absorb the impact of the sound wave and absorb the vibration energy of the sound.
We use a high-performance resilient system called the
ReductoClip System , which can be fixed to the face of your new stud frames and suspends your mass layers. This is the slimmest resilient system on the market, giving you high performance for minimal space loss.
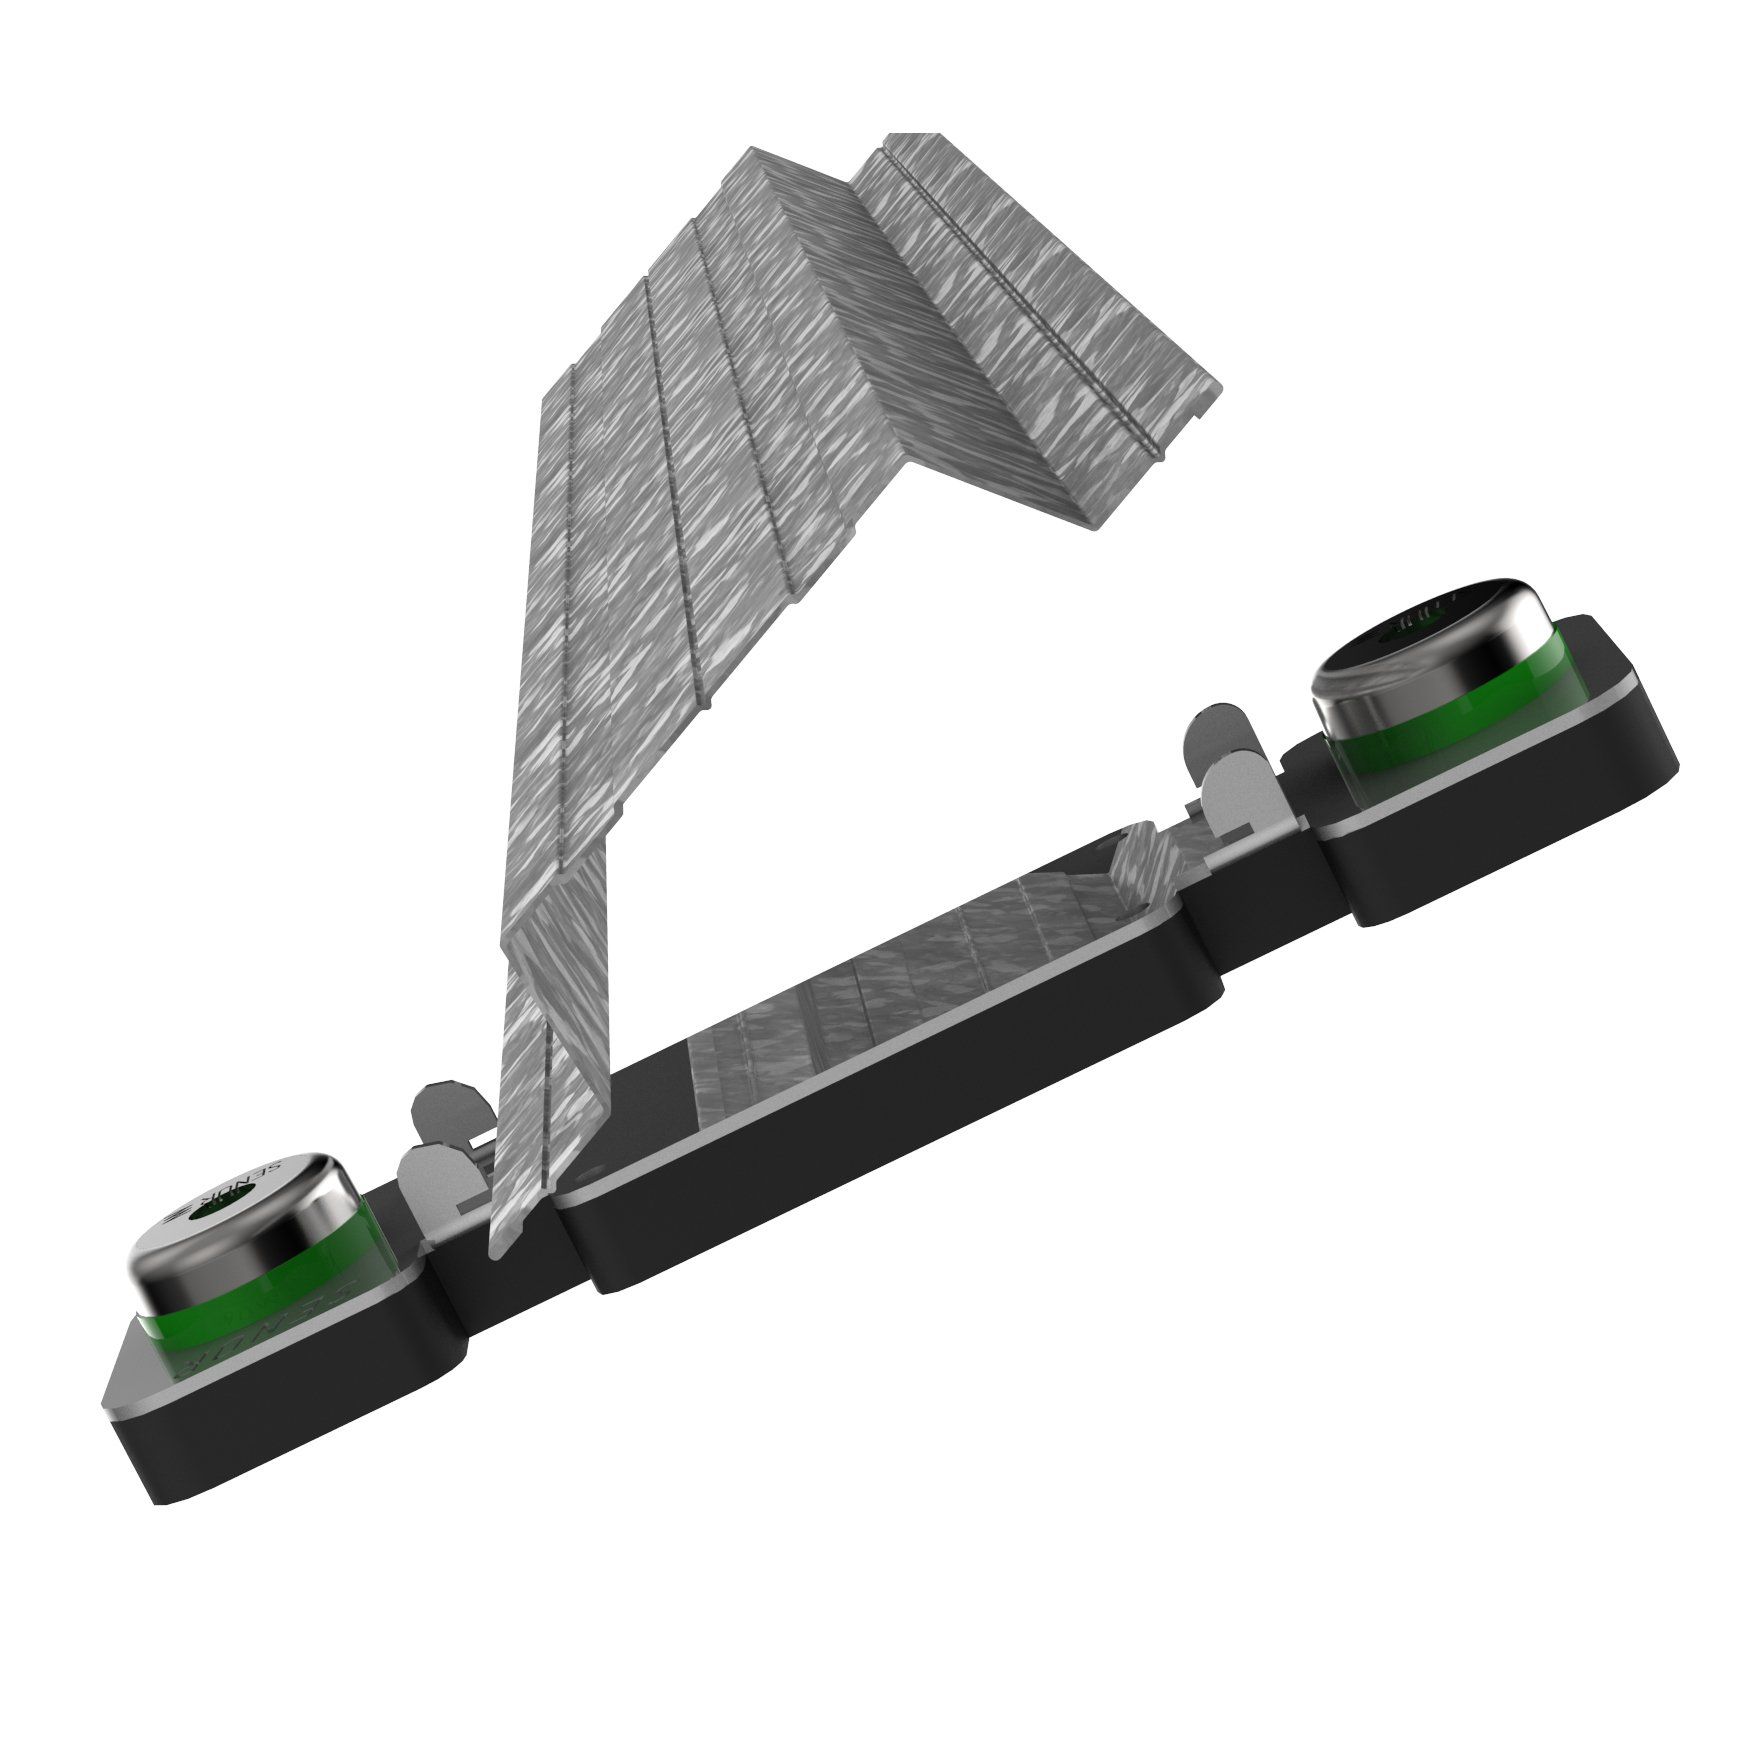
We use the same ReductoClip resilient system and mass layers for the ceiling to create a soundproof suspended ceiling.
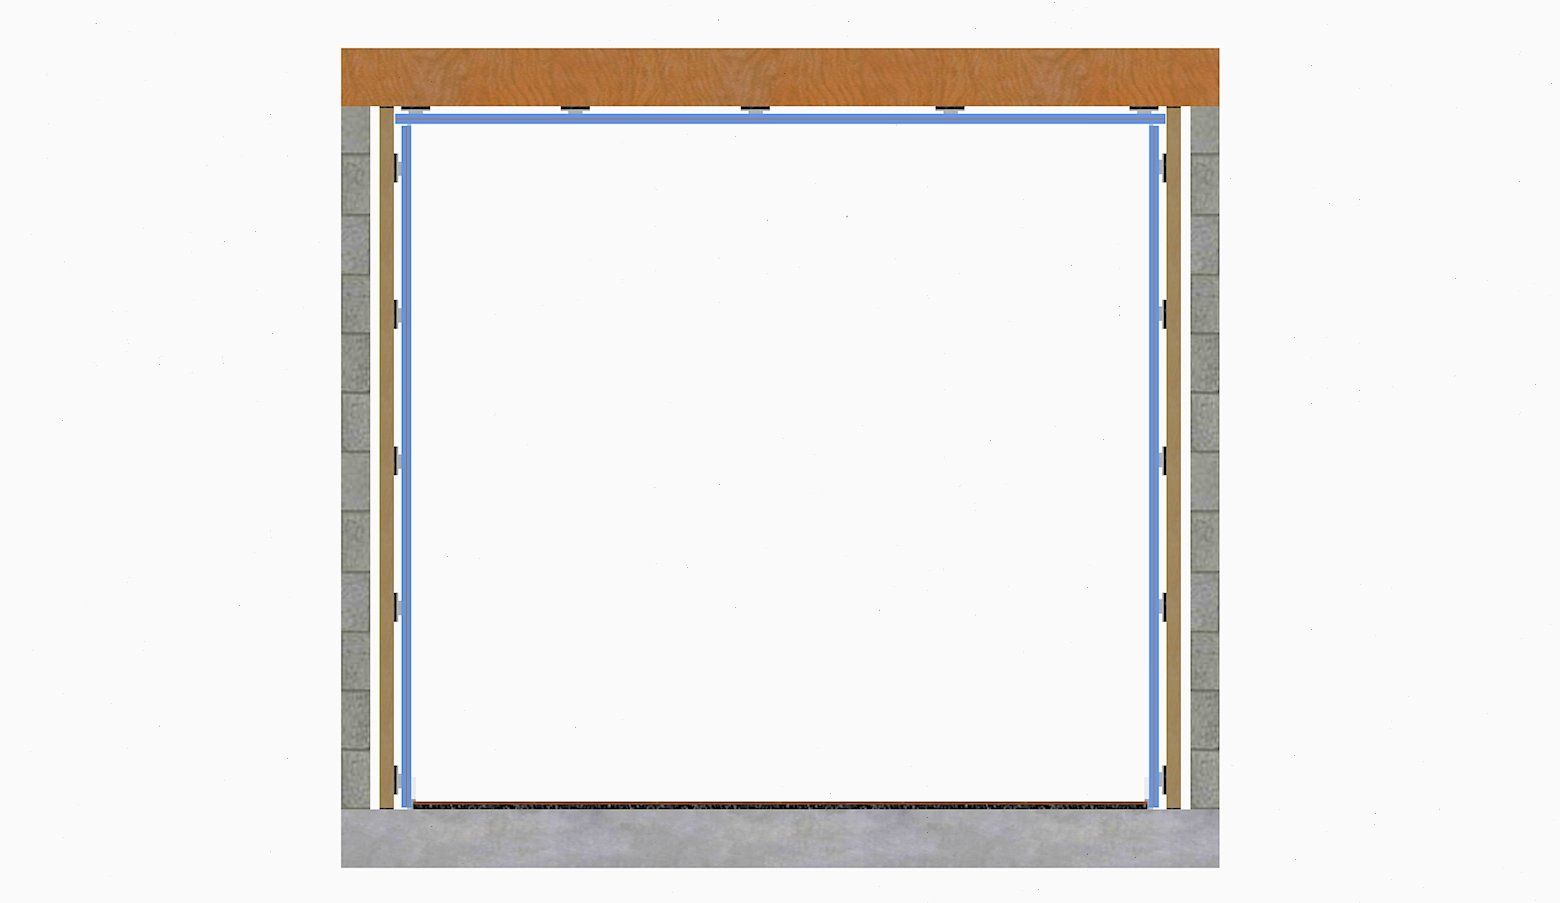
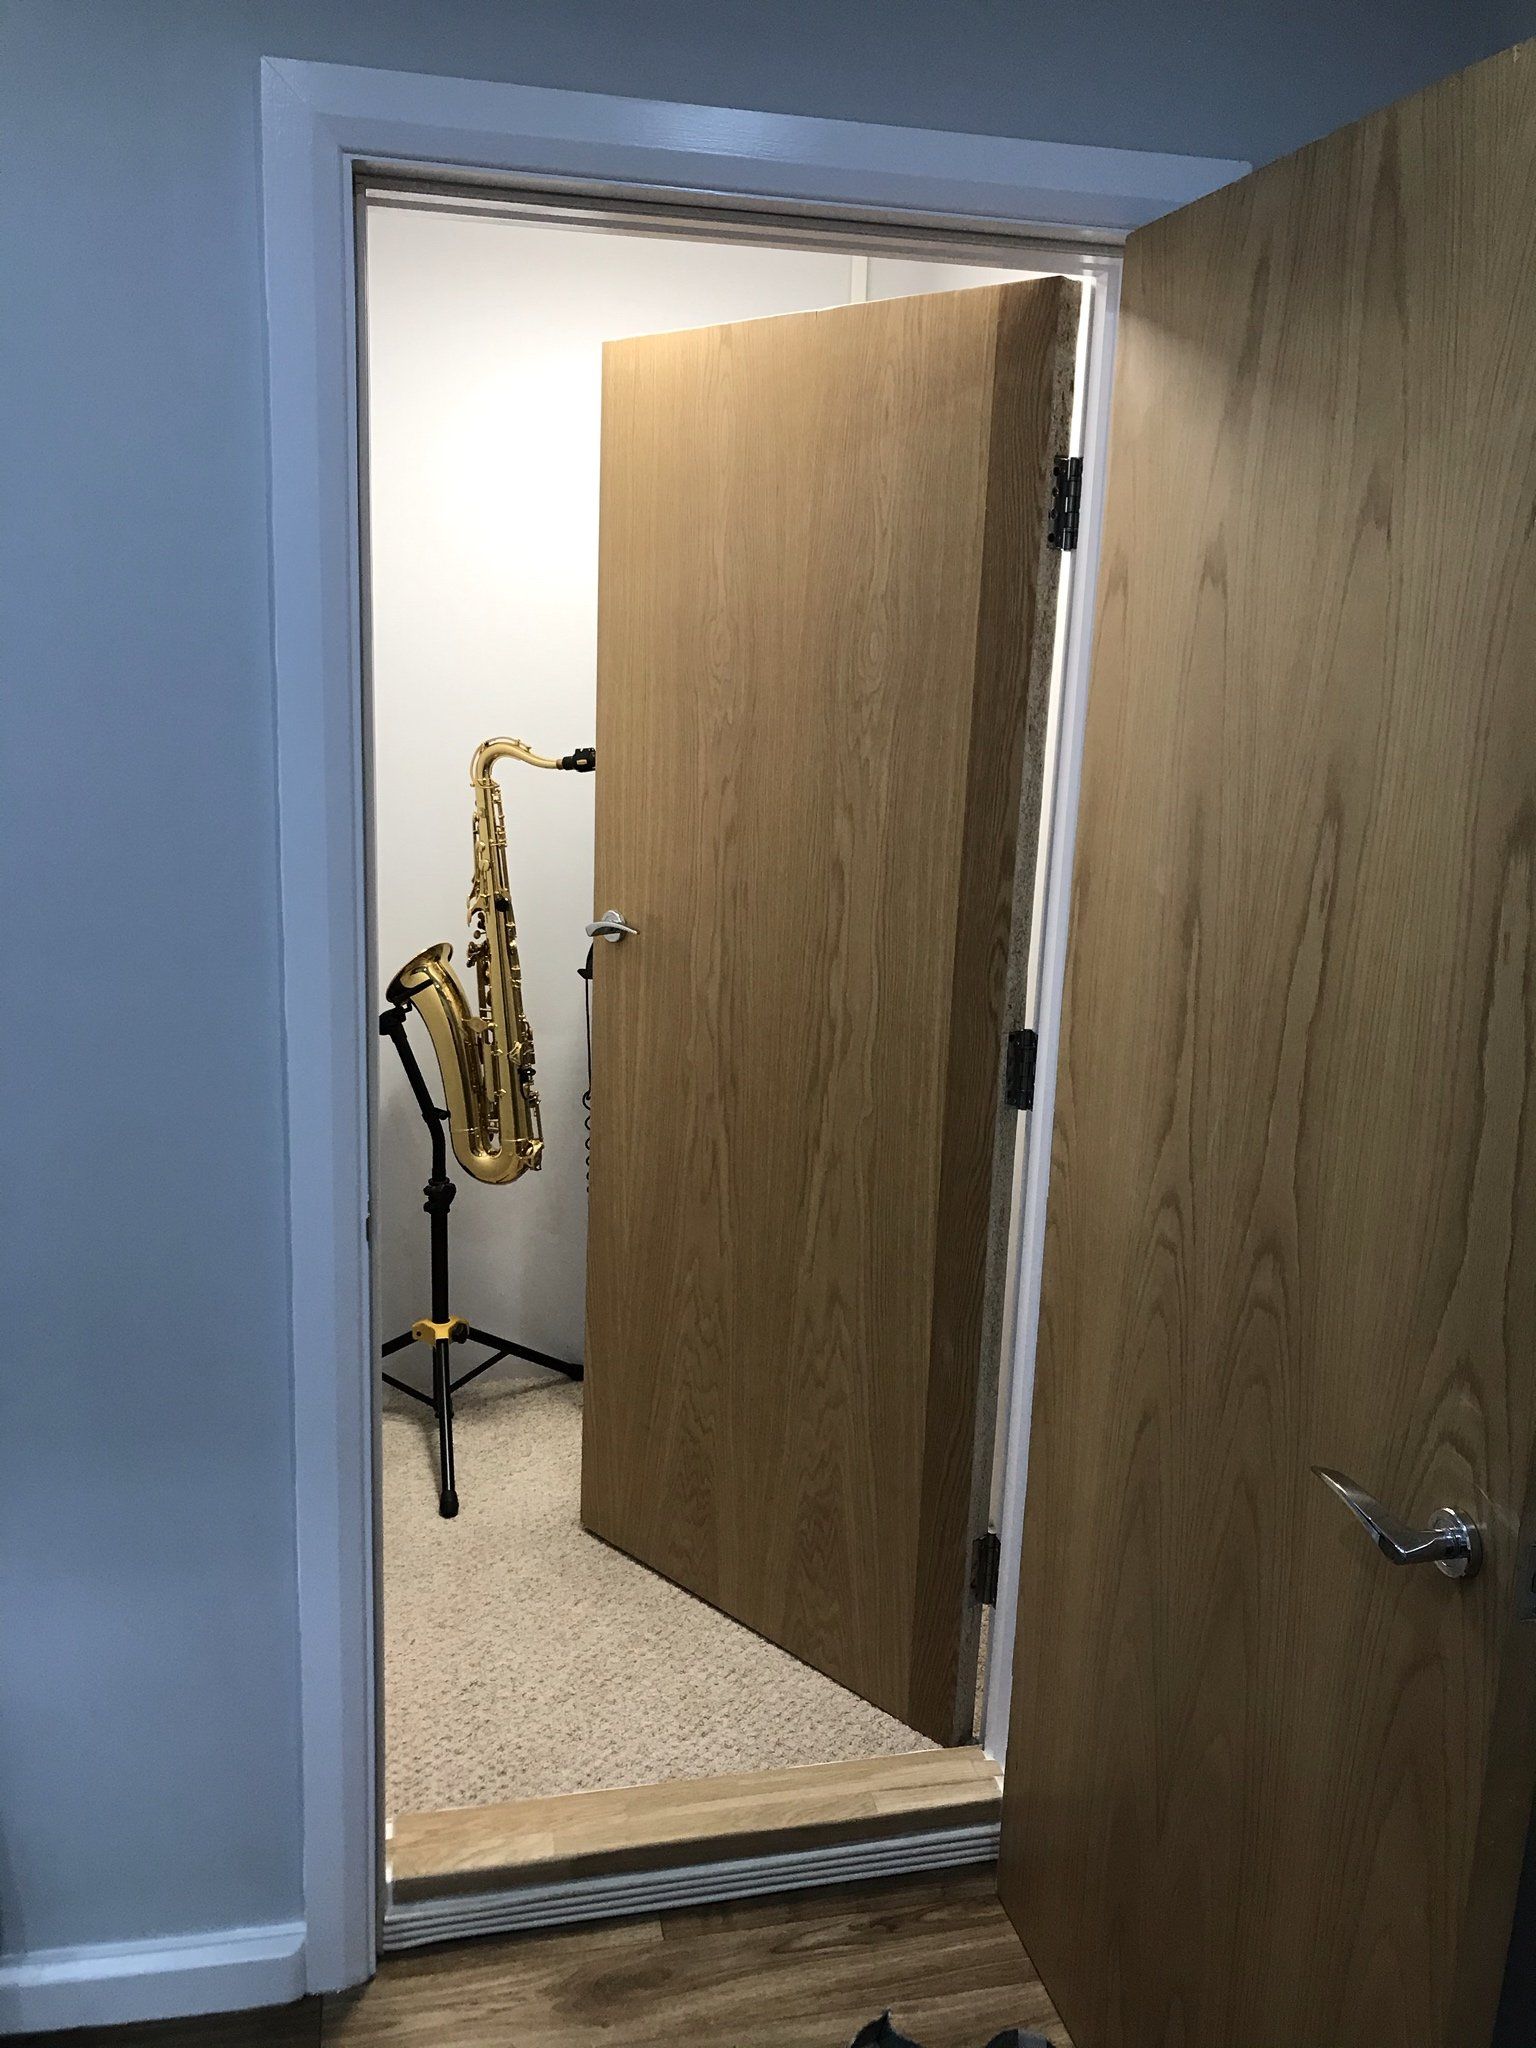
Step 4 - Windows and Doors
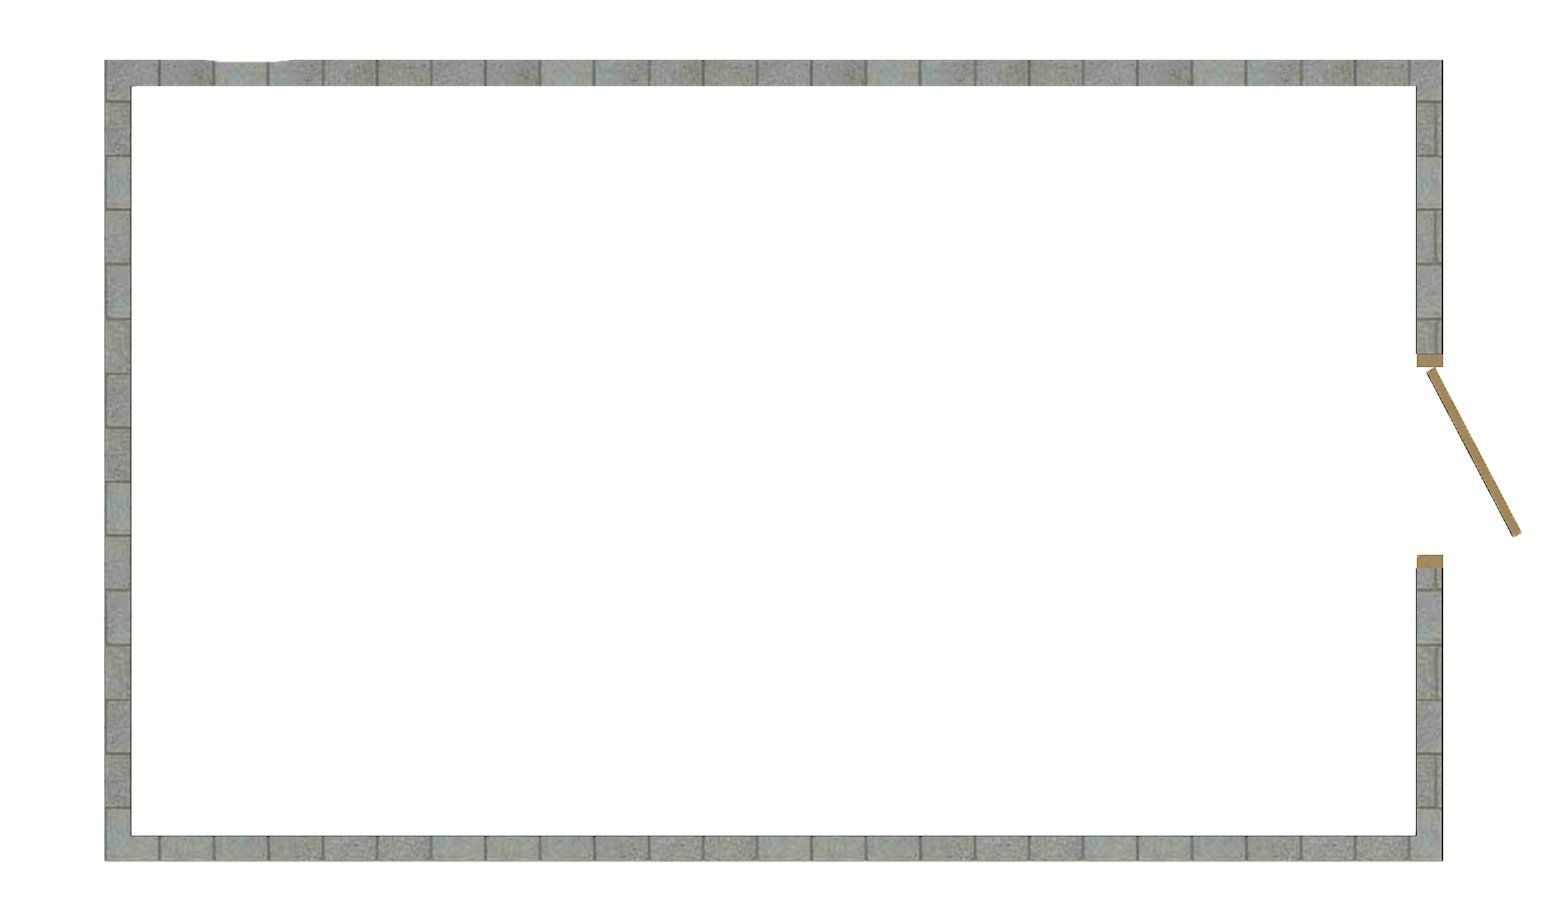
Windows and doors will always be the weak link as they have far less mass than the walls. In a perfect world we would have just one door and no windows.
We recommend using a double door system, using two heavy, solid core fire doors. One installed on the existing wall and one installed on the new stud frames. Door frames should have a good seal to make the door airtight.
Windows should utilise acoustic glass, and like doors we would recommend secondary glazing. A window on the existing wall, and a second window installed on the stud frame.
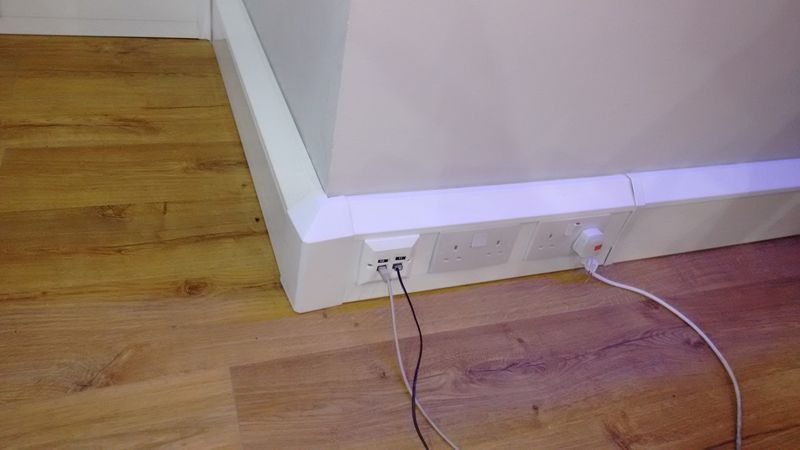
Step 5 - Power and Lighting
In a perfect world we would minimize the number of holes being cut into the mass layers as these create weaknesses.
For this reason, try and keep all power sockets and lighting fixtures surface mounted. Install onto the wall layers, not IN the wall layers.
You can even run the cabling for power sockets on the surface of the wall using trunking. This means if you need to change anything later, you do not need to open up your soundproof walls to get access.
Again, surface mounted lighting fixtures such as LED strips, pendant lighting or even free-standing lights such as lamps will be perfect. The worst case would be spotlights that need to be sunk into the ceiling.
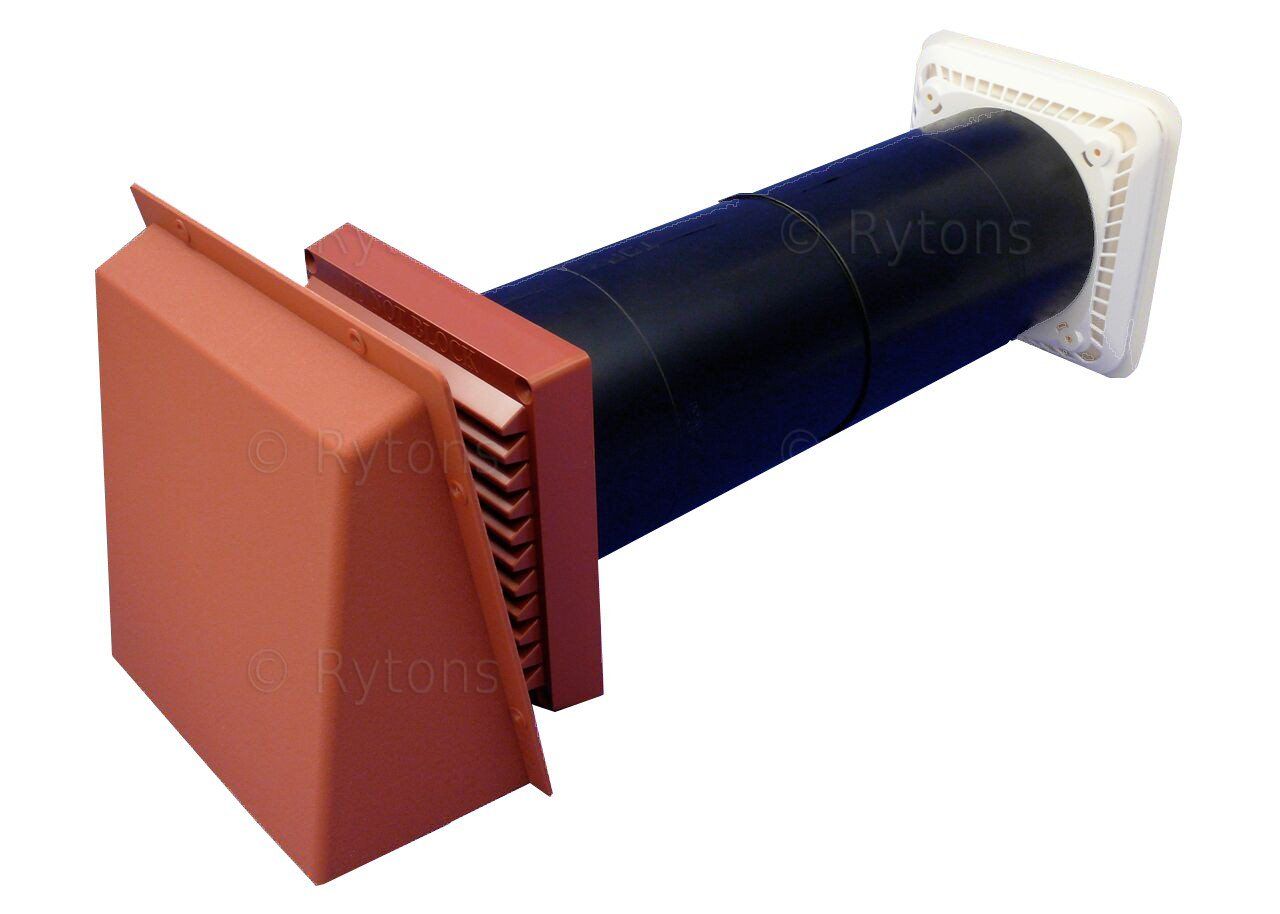
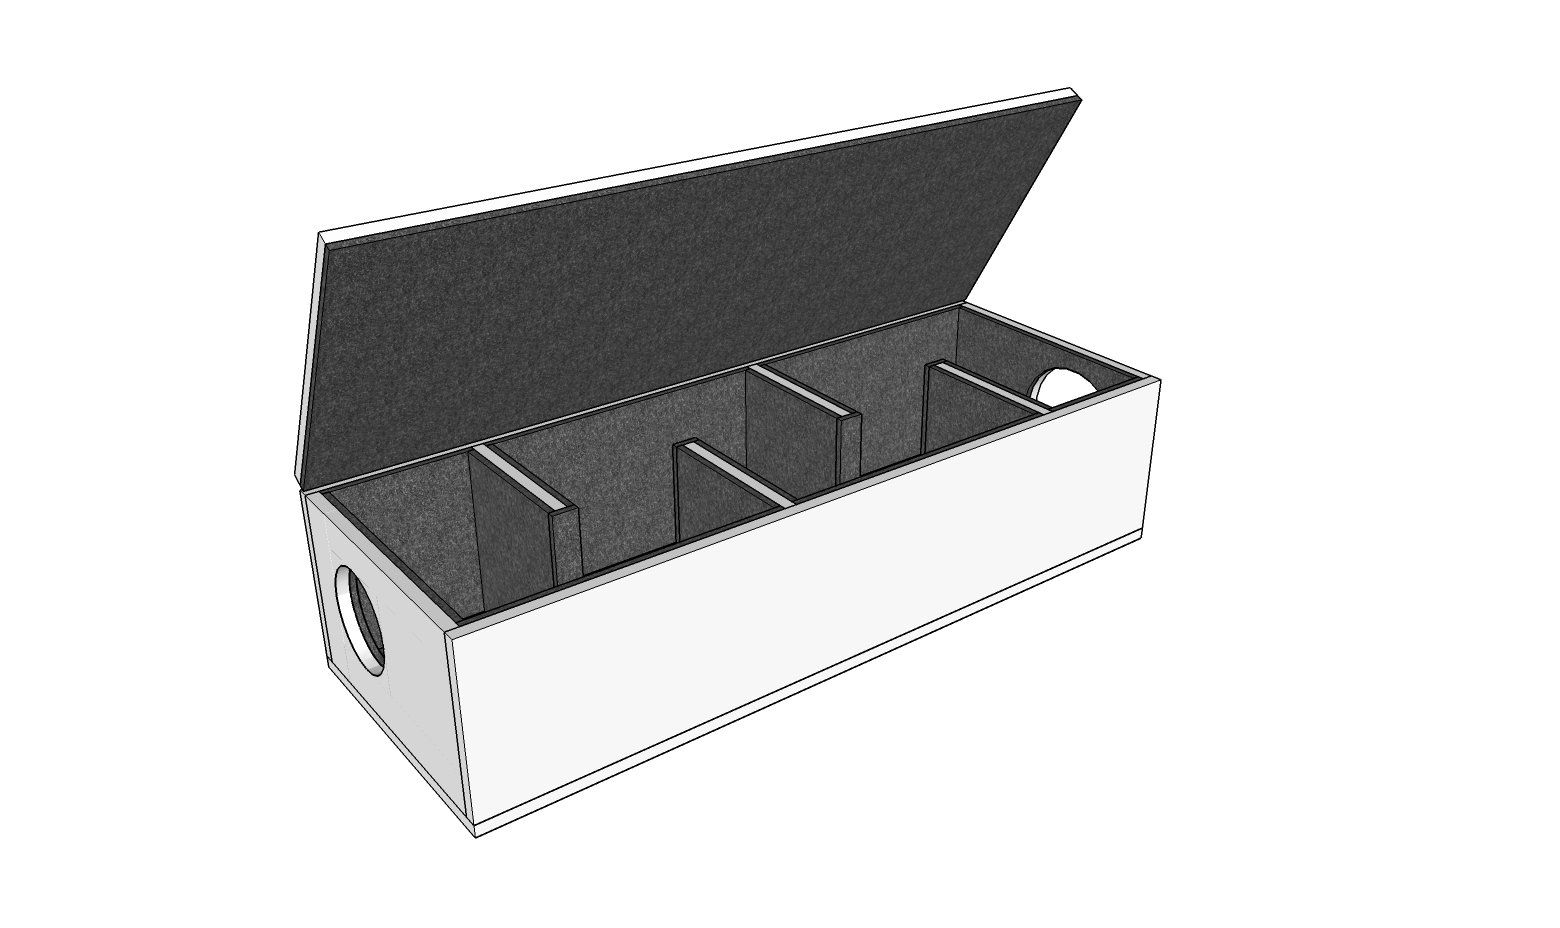
Step 6 - Ventilation
A well soundproofed room will be very well insulated and airtight. This will make the room warm and with no natural air flow. Therefore, we need some sort of ventilation system.
This will always be a weakness to a degree as this is basically a hole from the inside to outside but is unfortunately a necessary step.
You can use expensive, digital air conditioning systems and powered ventilation systems if you want, or just a basic in/out passive acoustic vent . But you will need to insulate any ducting and reduce as much sound from the outlet as you can by using baffles / silencers / attenuators.
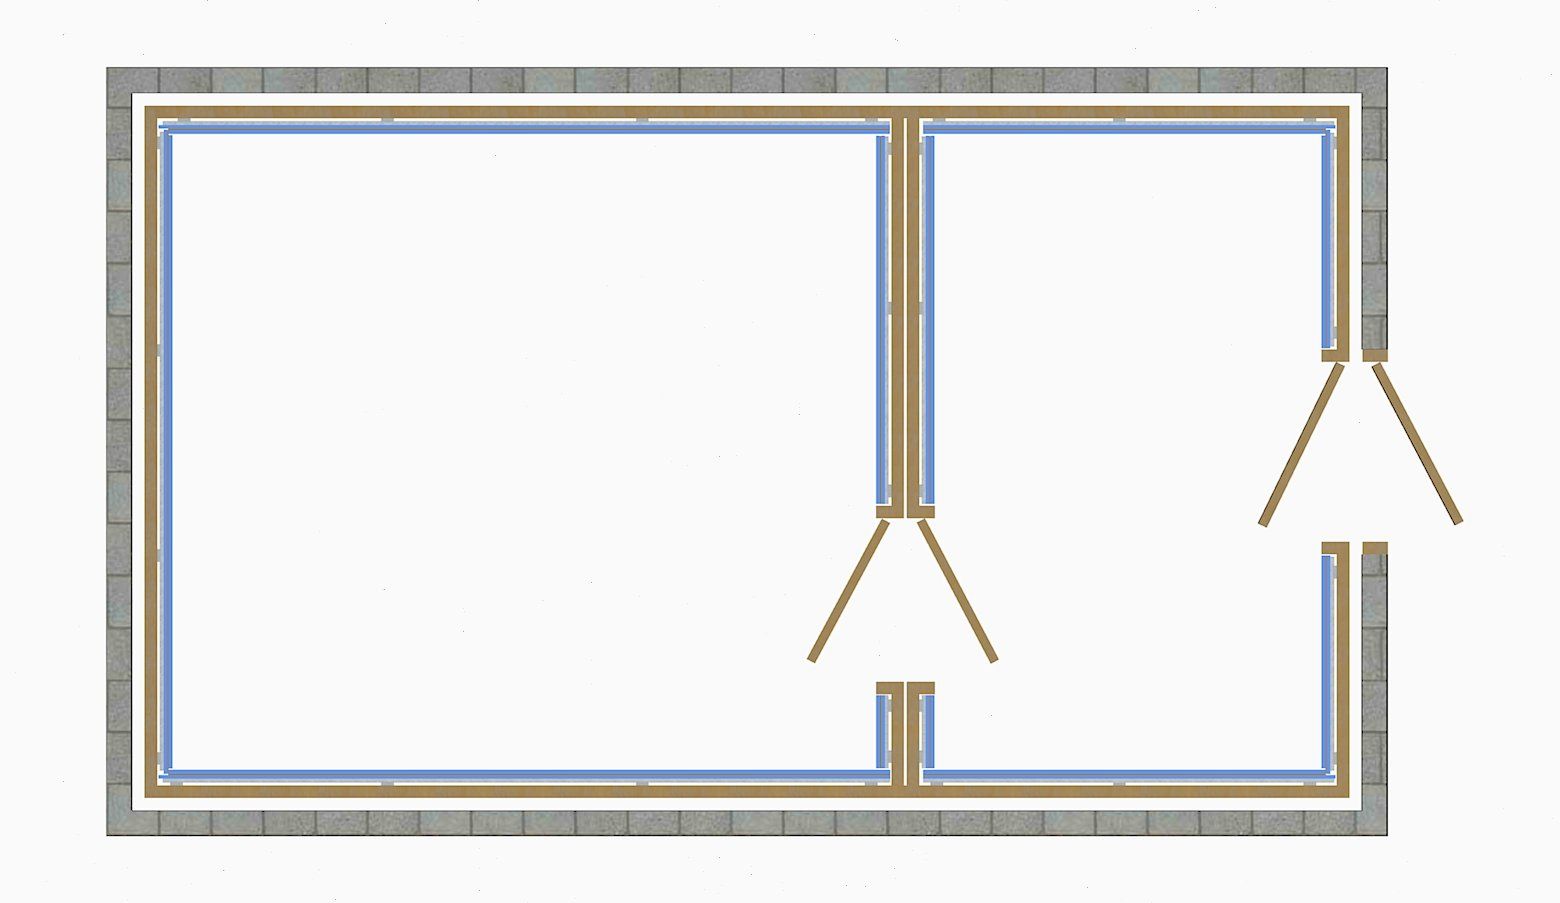
Two Room Studio (Live Room and Control Room or Multiple Practice Rooms)
In the example we use the same principle making two new internal rooms with a double stud frame separating one room from the other with a high level of isolation between the two.
Material Cost
This will be determined by the size of the room and quality of the construction, but in our experience, a rough guide for a one room studio is around £3,000 - £5,000 for soundproofing materials not including secondary windows if needed. This is based on a room of around
15 - 20m2 area or 4m x 4m , 4m x 5m.
If you are interested in building your own home studio or practice room and would like an idea of material cost for your space, we will need your dimensions, ideally a floor plan of the existing space, photos of the existing space if possible, and as much detail about the construction of the existing building.
We can then put together a full specification for your needs with a free, no obligation material estimate.
Conclusion
Blocking out high decibel levels of sound is not easy, and there is no quick, simple, cheap fix. If you were thinking that studio soundproofing was as simple as egg box type foam on the walls, or thick curtains, then check out our Soundproofing Myths Blog.
If you are not willing to take the steps detailed above, or able to invest this level of budget, then your results will be very limited, and your expectations should be set very low.
If you can take the necessary steps and make the necessary investment, you can achieve really great results as all of our past studio clients have.
If you are serious about soundproofing your home studio or practice room and have any questions or would like help putting together a costing, please get in touch with our dedicated studio team by calling 01423 206208 or use our Contact Page below to send us a message.
Please share this article if you find it useful:
"We don’t expect you to become an overnight expert in soundproofing, that’s what we’re here for."