
How to soundproof a wall?

How to soundproof a wall from noisy neighbours
The Soundproofing Store has been soundproofing walls in the UK for over 10 years and have hundreds of 5* reviews on Trusted Shops.
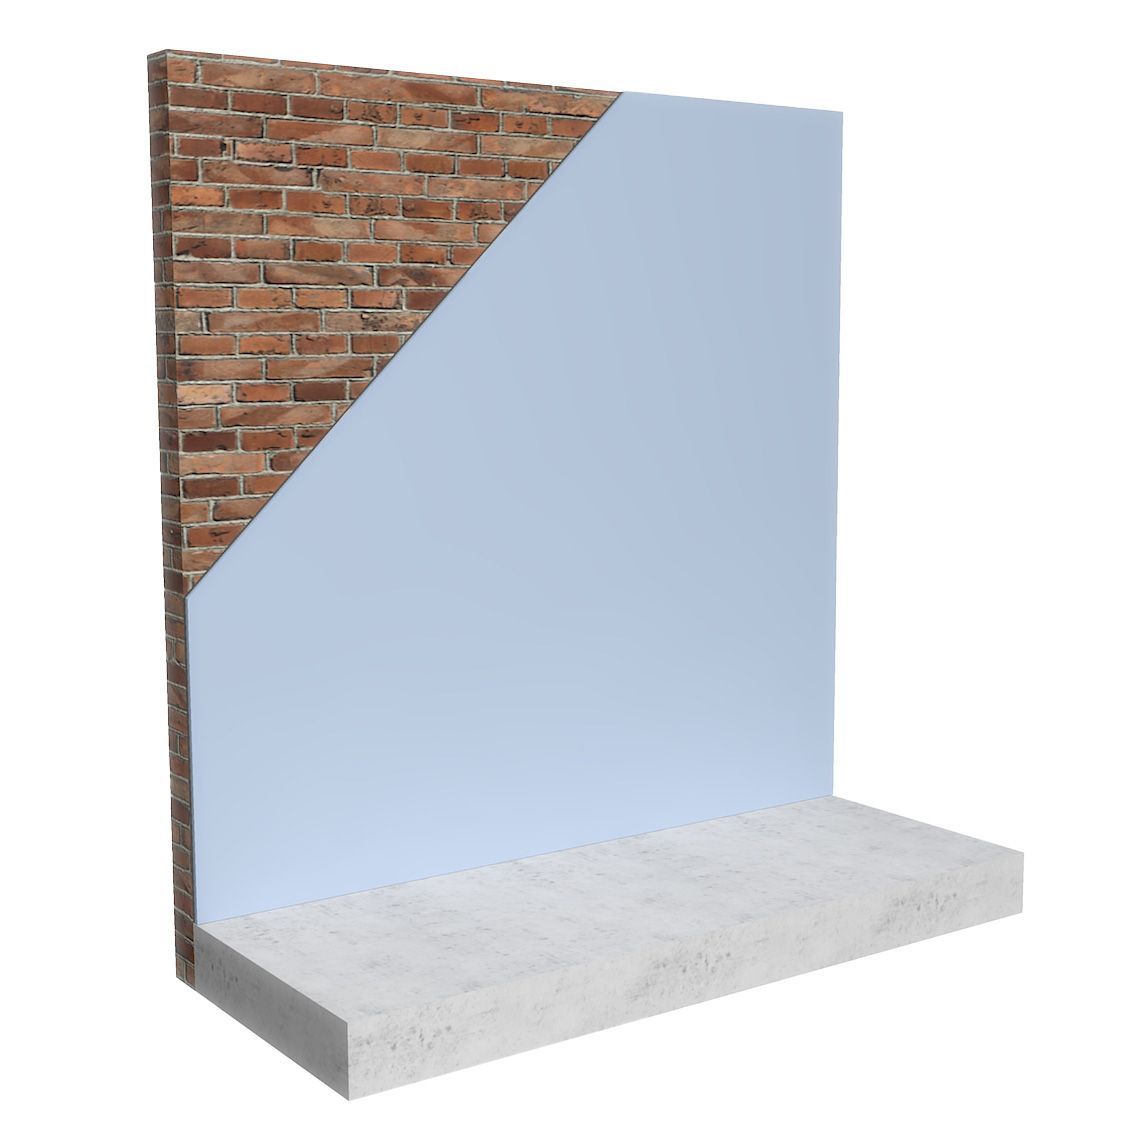
In the United Kingdom, brick walls frequently act as a partition between connected and semi-detached residences. When you have a shared wall with your neighbour, known as a "party wall," noise can easily pass through it. If the wall lacks proper construction, you may be subjected to unwanted sounds from the adjacent side.
To enhance the soundproofing of your brick wall, consider separating it from your neighbour's wall to create a gap, and then use professional soundproofing materials to absorb sound energy and vibrations.
When considering ways to soundproof a wall, various methods are available, depending on the noise level and the type of wall (solid or stud). Here are some effective techniques to assist you in minimising noise.
1. Identify where the noise is coming from
Press your ear against different sections of the wall to identify the areas where most noise is coming through (for instance, alcove walls are usually much thinner than chimney breasts) this will help you identify the areas that need sound proofing.
2. Add mass to the wall
One of the simplest ways to reduce noise through a brick wall is to add heavy/dense materials to your wall.
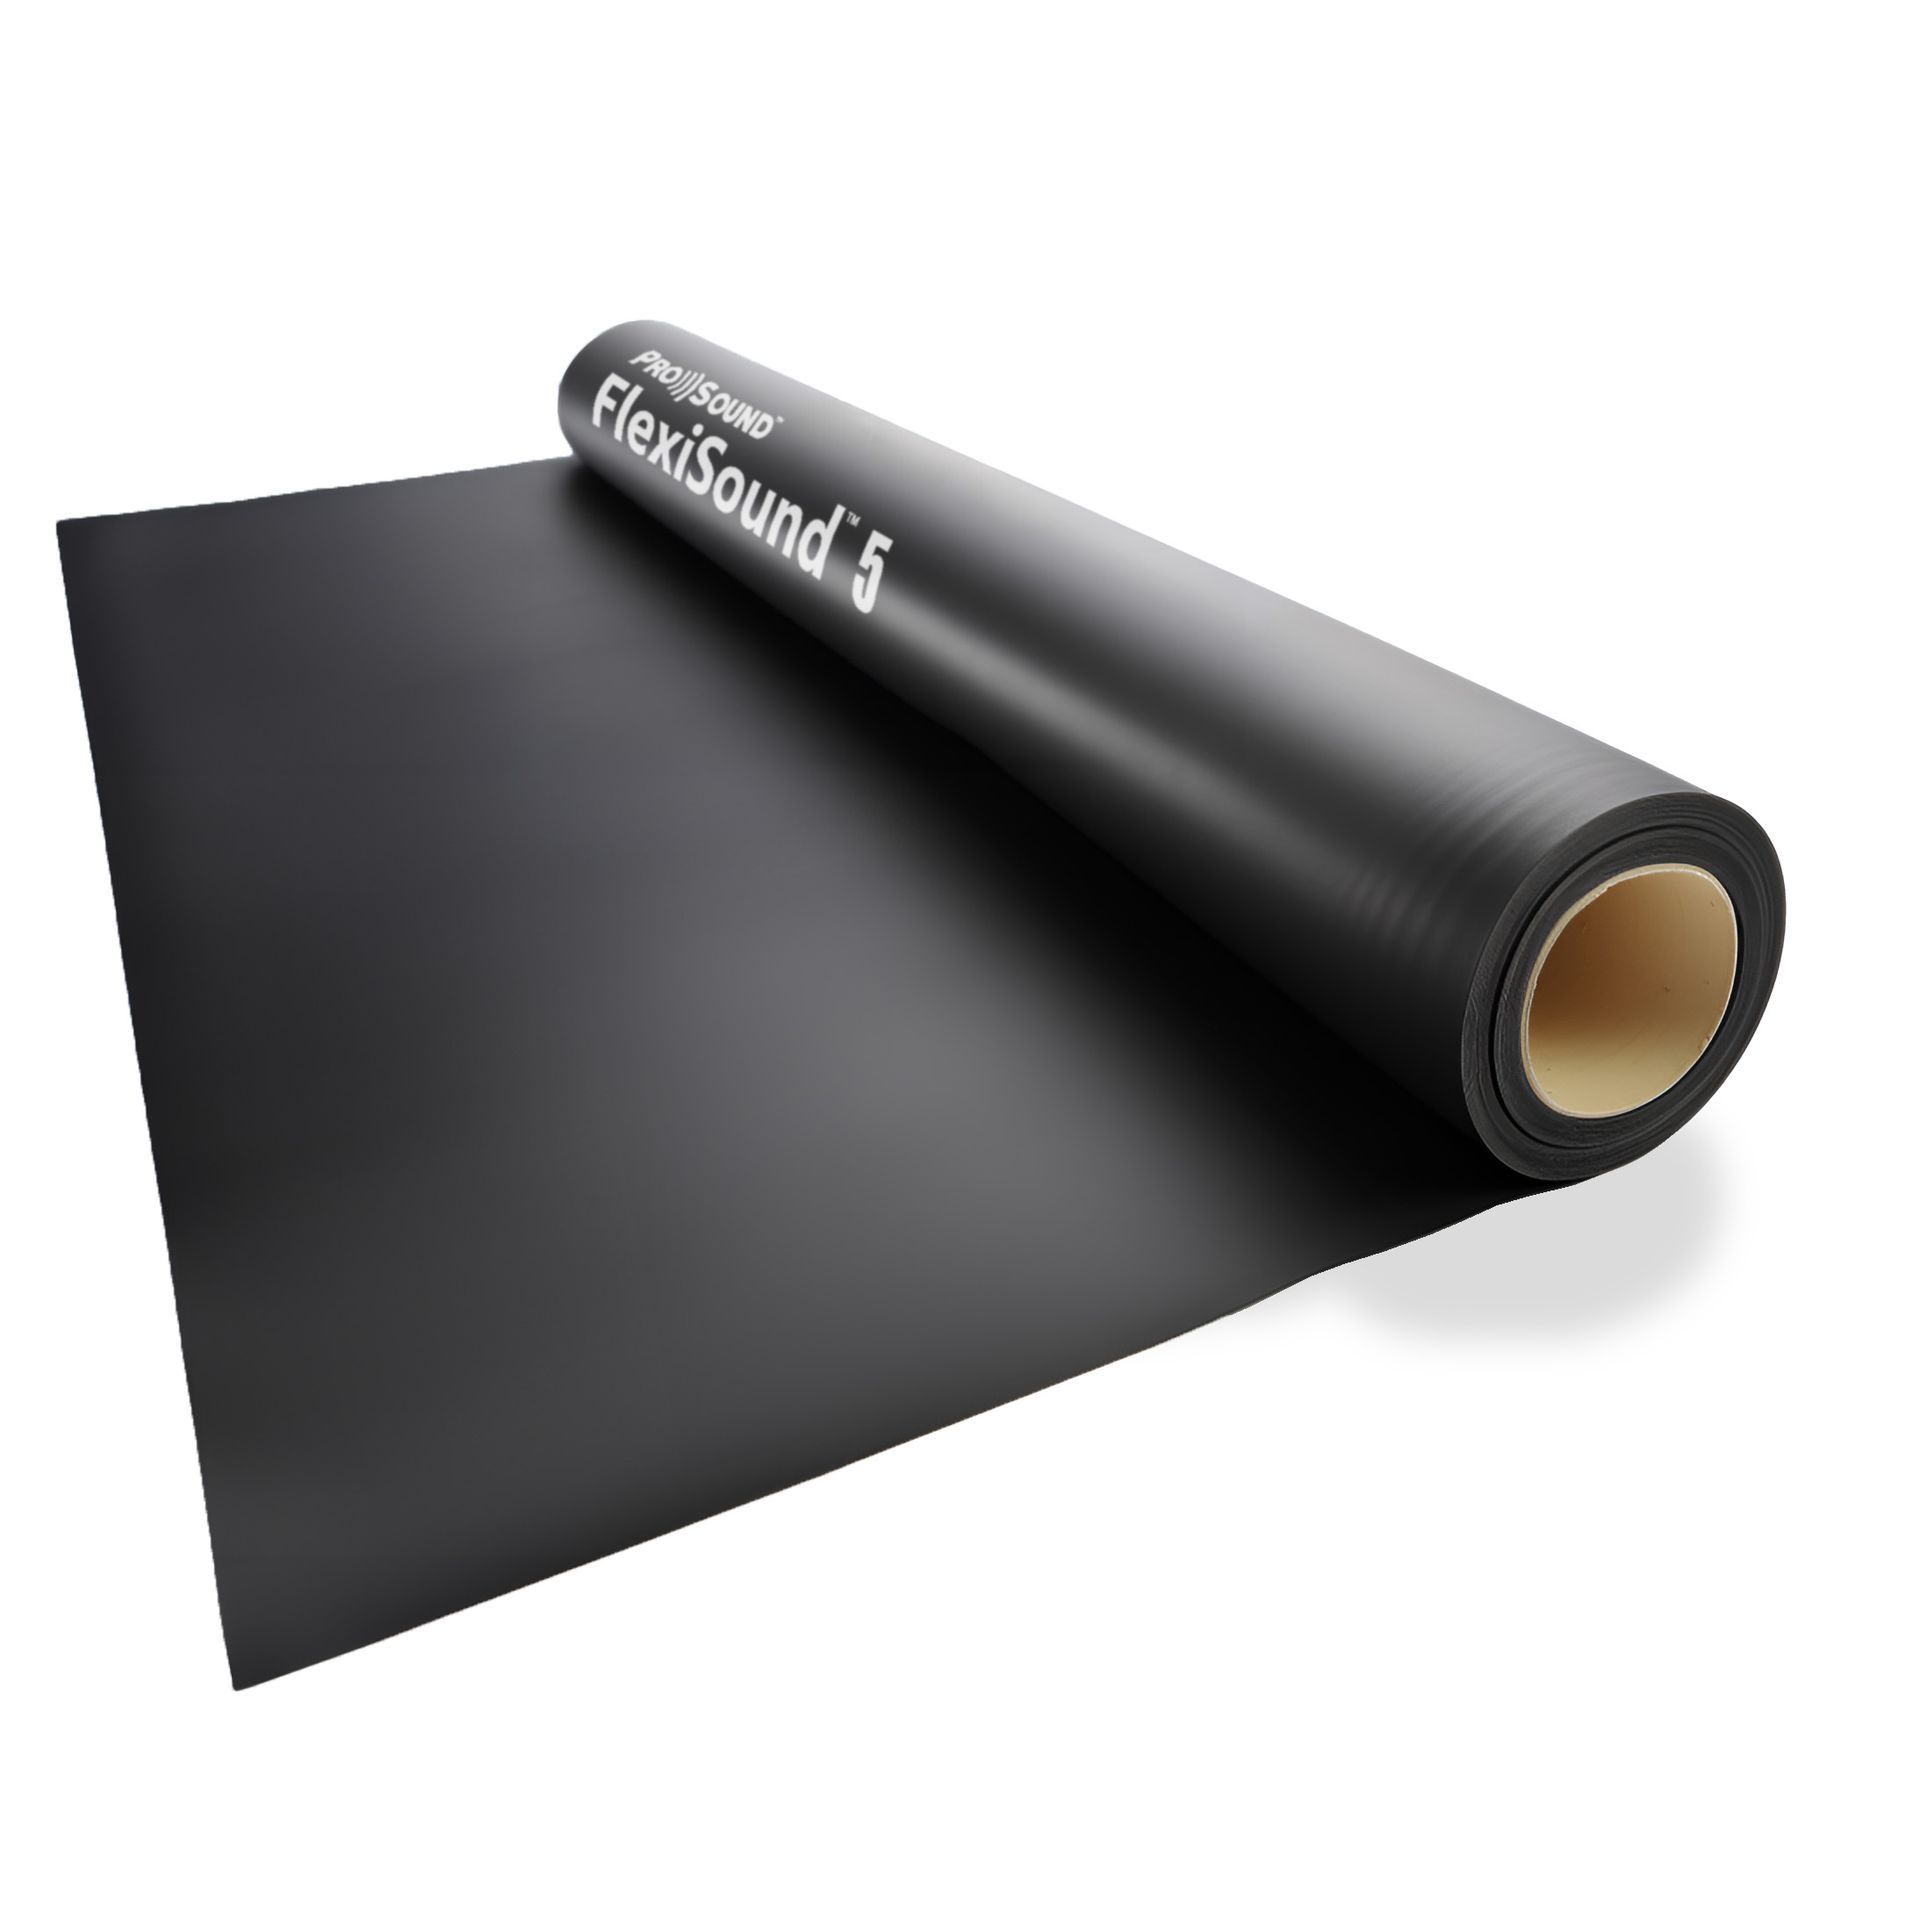
Installing soundproofing layers such as SoundBoard 4 or FlexiSound 5 with a layer of acoustic plasterboard on top can significantly reduce unwanted noise.
(Please note this solution is not effective for low bass frequencies)

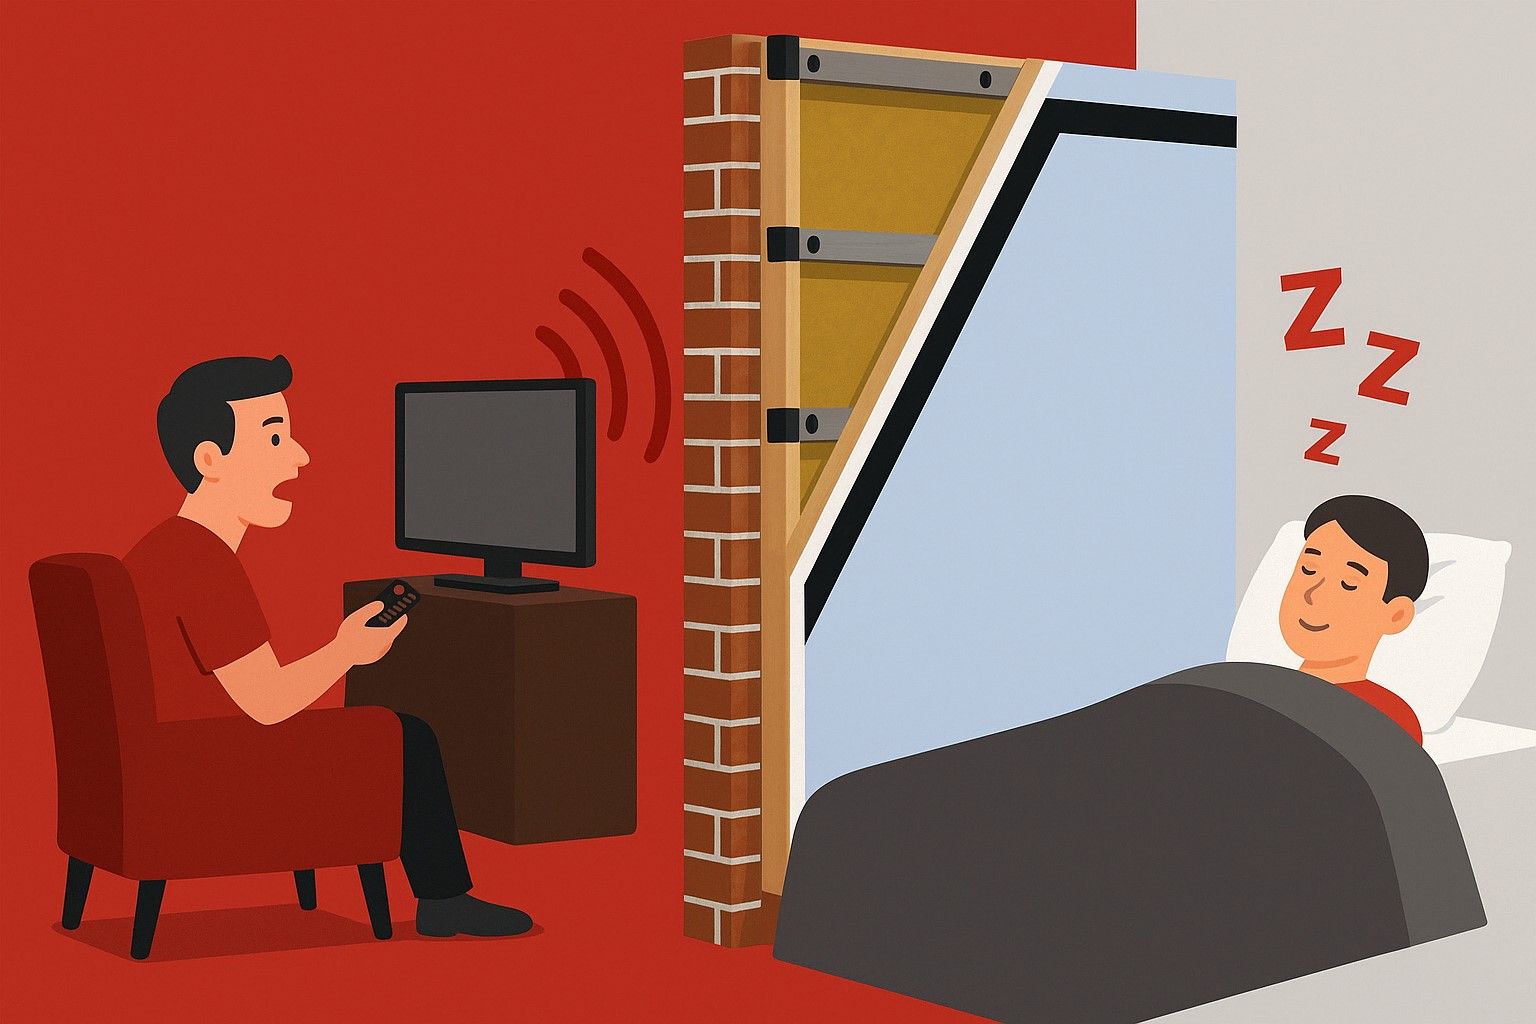
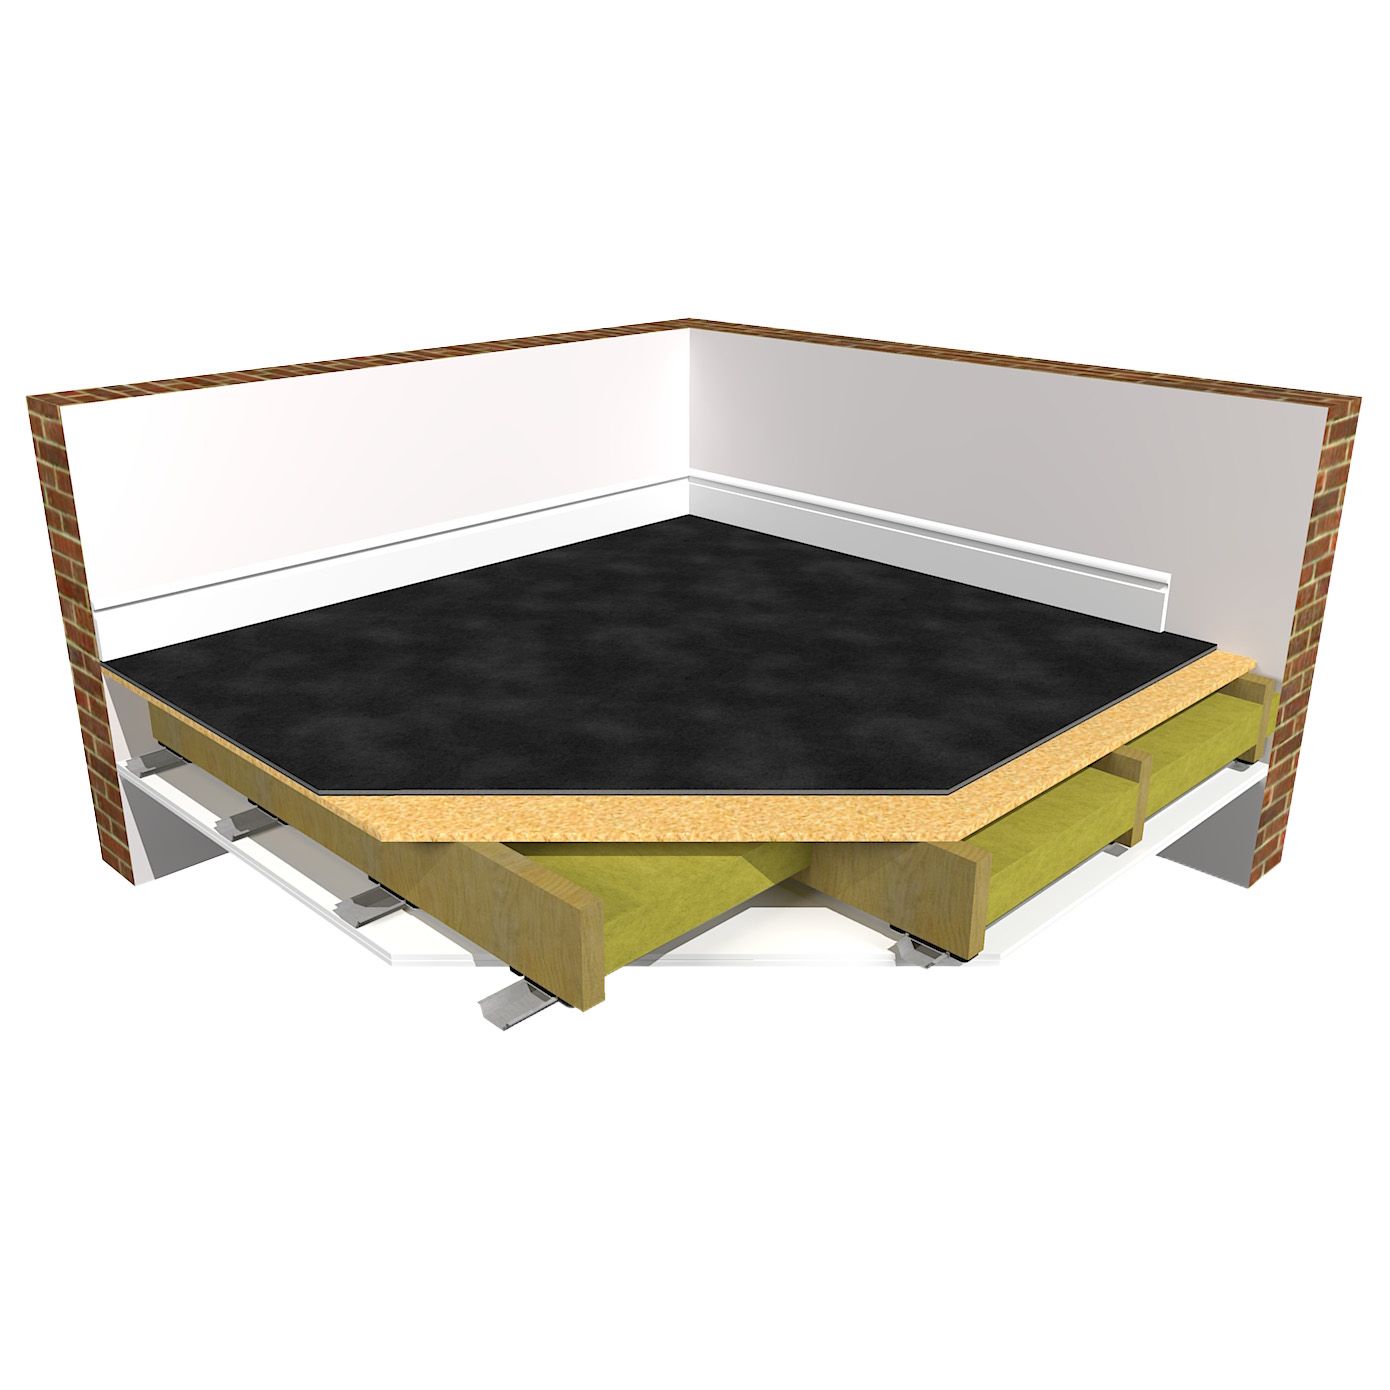
2. Add a new wall in front of the existing wall
Adding a new fake wall is the most effective way to soundproof a wall although you will lose more space. Soundproofing clips such as the ReductoClip can be fitted directly to the wall if space is a premium, or for higher performance they should be fitted to a new independent stud wall. These clips will reduce the amount of sound energy and vibration that can be transmitted through the wall. You should then add further layers of high density materials.
(These systems offer a higher performance than just adding mass directly to the wall and work better for lower bass frequencies)
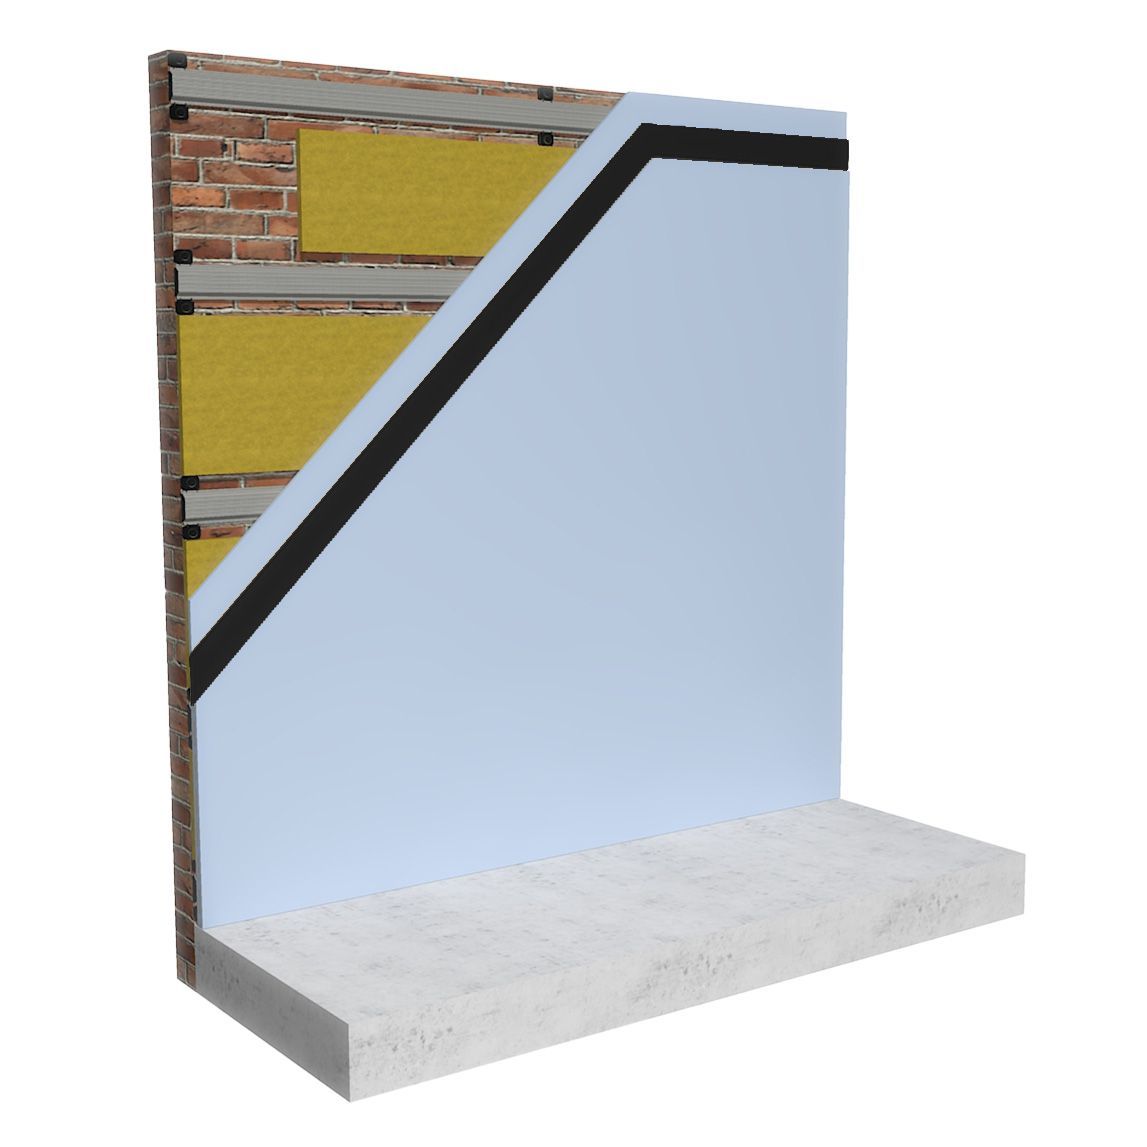
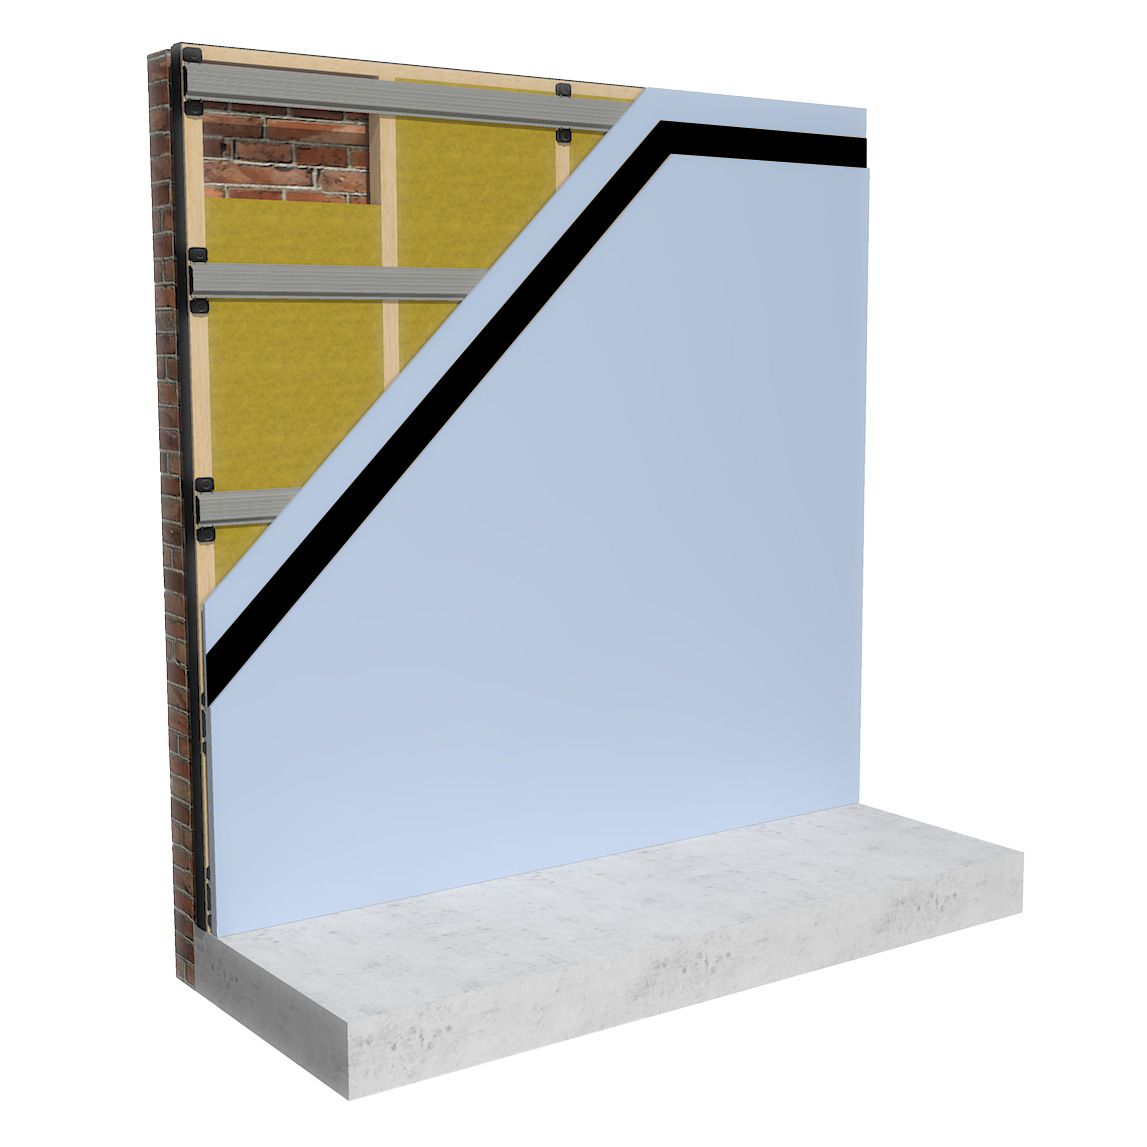
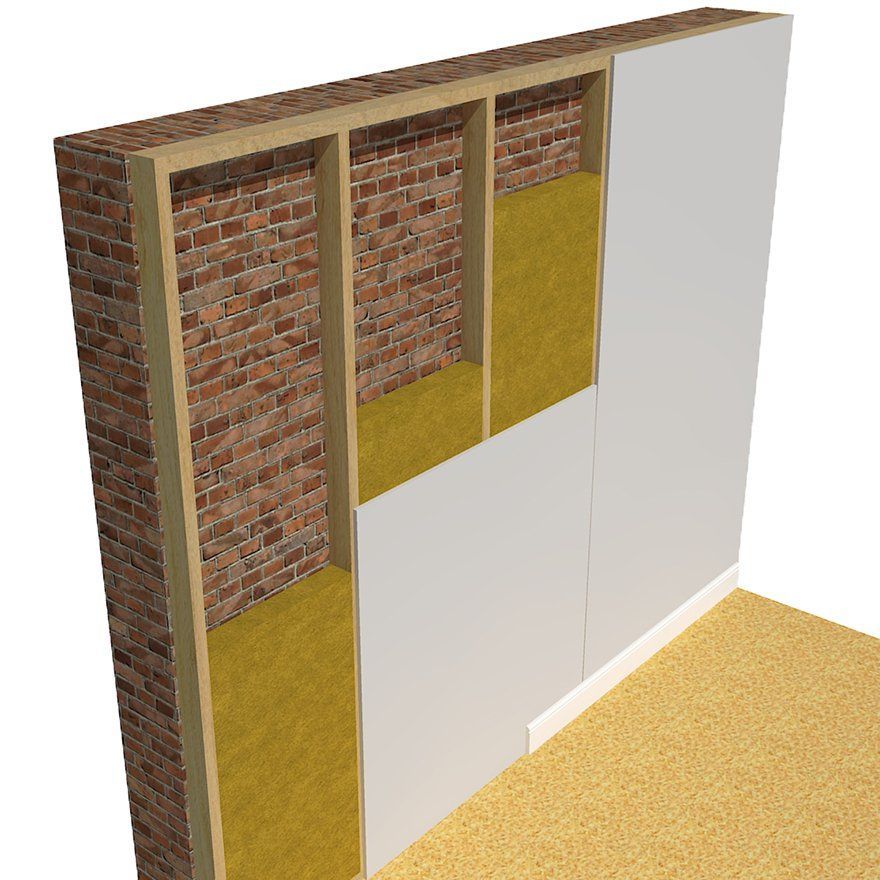
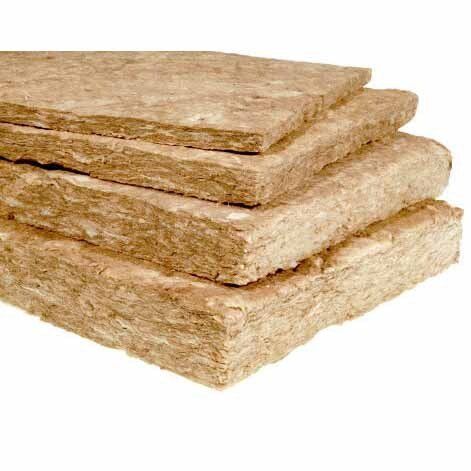
3. Use acoustic insulation in any cavities
Enhancing the soundproofing of walls is possible by integrating soundproofing insulation in cavities or sealed areas. Acoustic grade mineral wool slabs are designed to optimise sound absorption within the cavity between the new wall, consequently boosting acoustic performance and reducing reverberation.
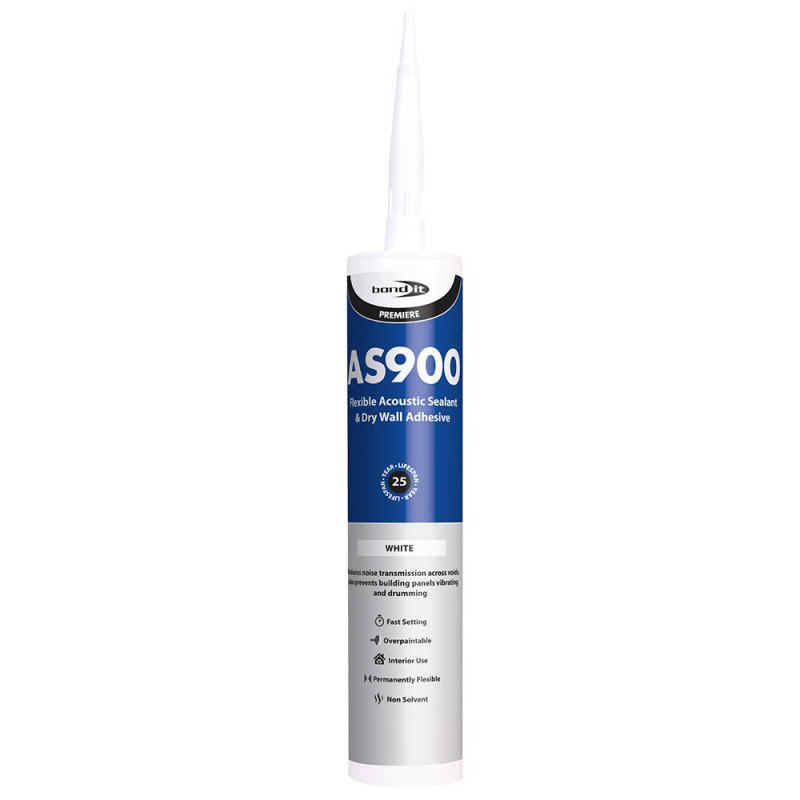
4. Seal all gaps and holes
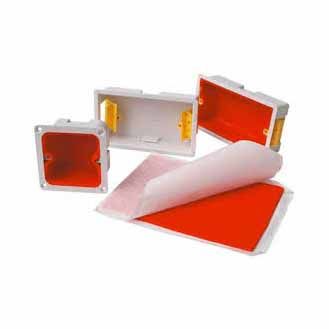
Minor gaps and holes can allow a significant amount of noise to pass through, which is why it's important to apply acoustic sealant along the perimeter of the wall and around small openings for electrical wiring and pipework. Enhance the soundproofing of electrical sockets by using acoustic putty pads.
5. Additional tips
Address any flanking paths
Sound may also move through alternative paths like ceilings, floors, and side walls. Place your ear against these surfaces and compare the noise levels with the wall. If the noise is just as loud as through the wall, you may be dealing with a flanking noise issue.
Do not use acoustic foam panels for soundproofing
Acoustic panels DO NOT BLOCK NOISE they only help with sound reverberation and echo within a room.
Helpful wall soundproofing guide

Author
Ian Baker, the Managing Director of The Soundproofing Store, is a prominent figure in the soundproofing sector. His distinguished history of award-winning achievements and development of trademarked, superior wall soundproofing solutions establish him as a revered and reliable expert in the field.
Share
"We don’t expect you to become an overnight expert in soundproofing, that’s what we’re here for."